DIY Exploration
Overview
I was inspired by the beautiful jewelry of Britta Boeckmann and the amazing glowing resin shelves of Mat Brown. I wanted to combine the two for a one-of-a-kind gift this Christmas!
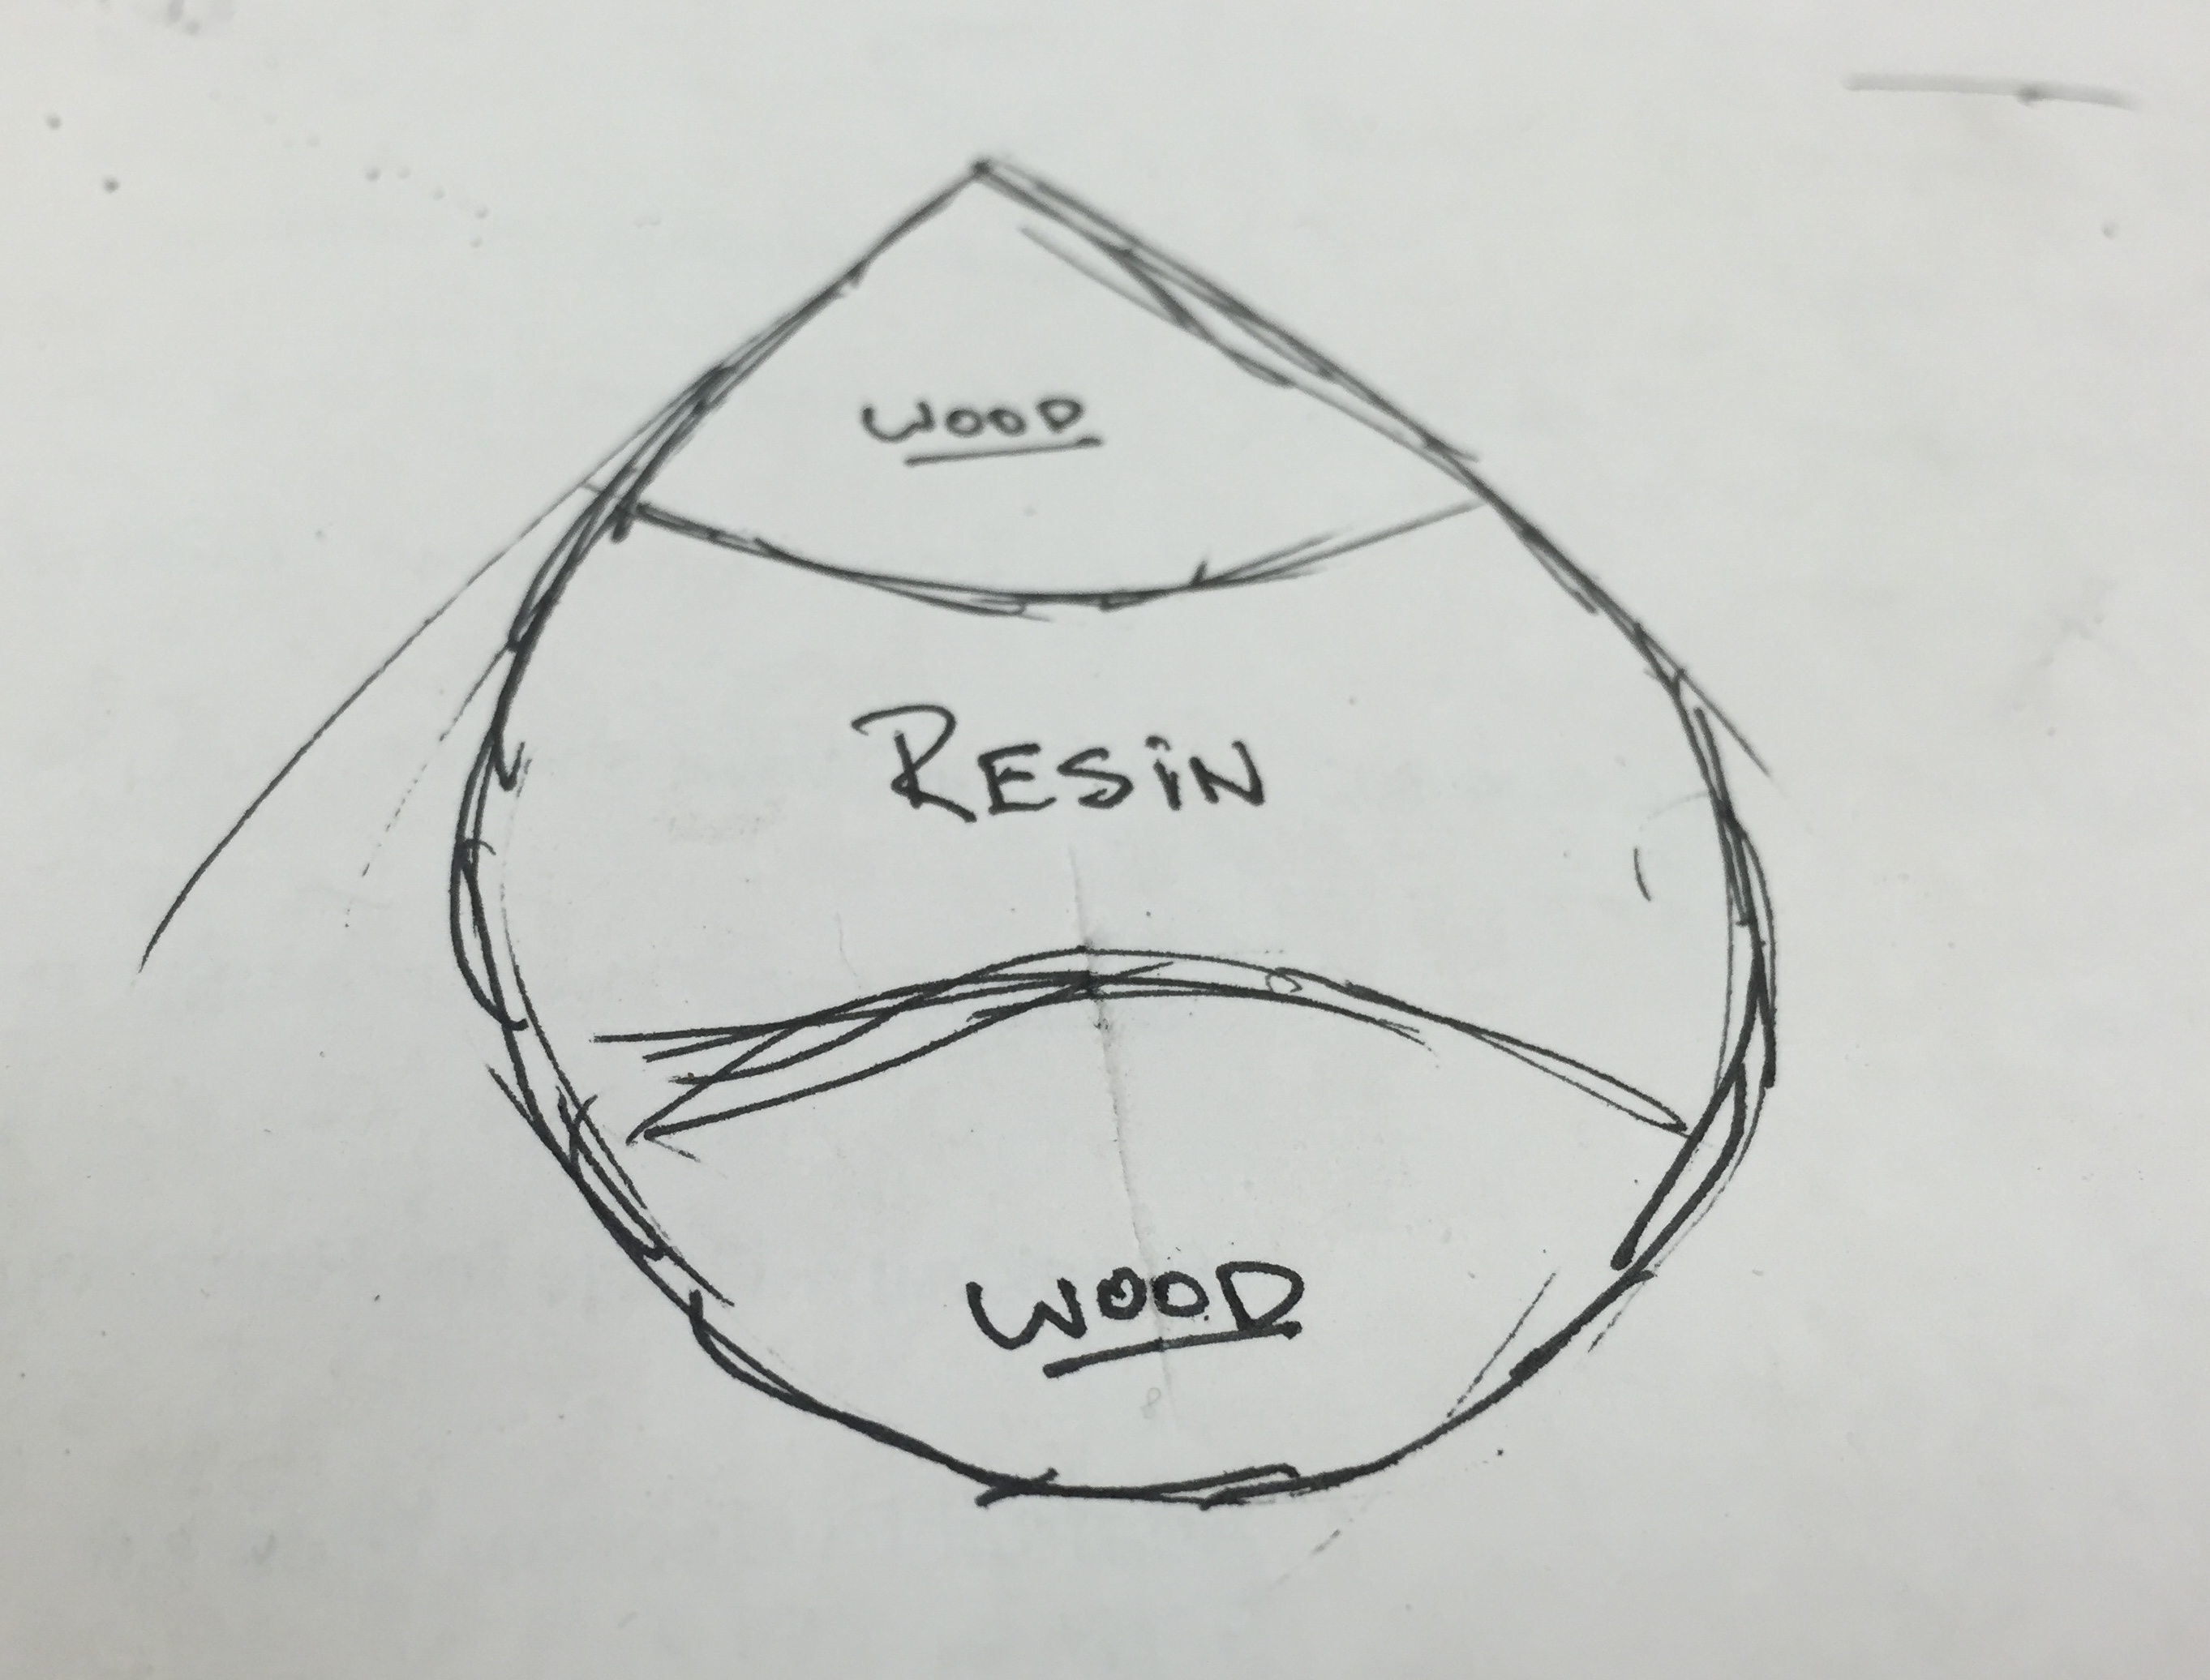
The initial sketch!
Building the Resin Cast
Began laser cutting acrylic pieces to create a box for casting the resin. Hot glue held the cast together and kept the wood down. If I were to do this again, I would tab the pieces instead of making them straight-edged and skip hot gluing the wood down - the hot glue created pockets of resin underneath the wood that took a lot of sanding to level out and a weight on top while pouring the resin should suffice.
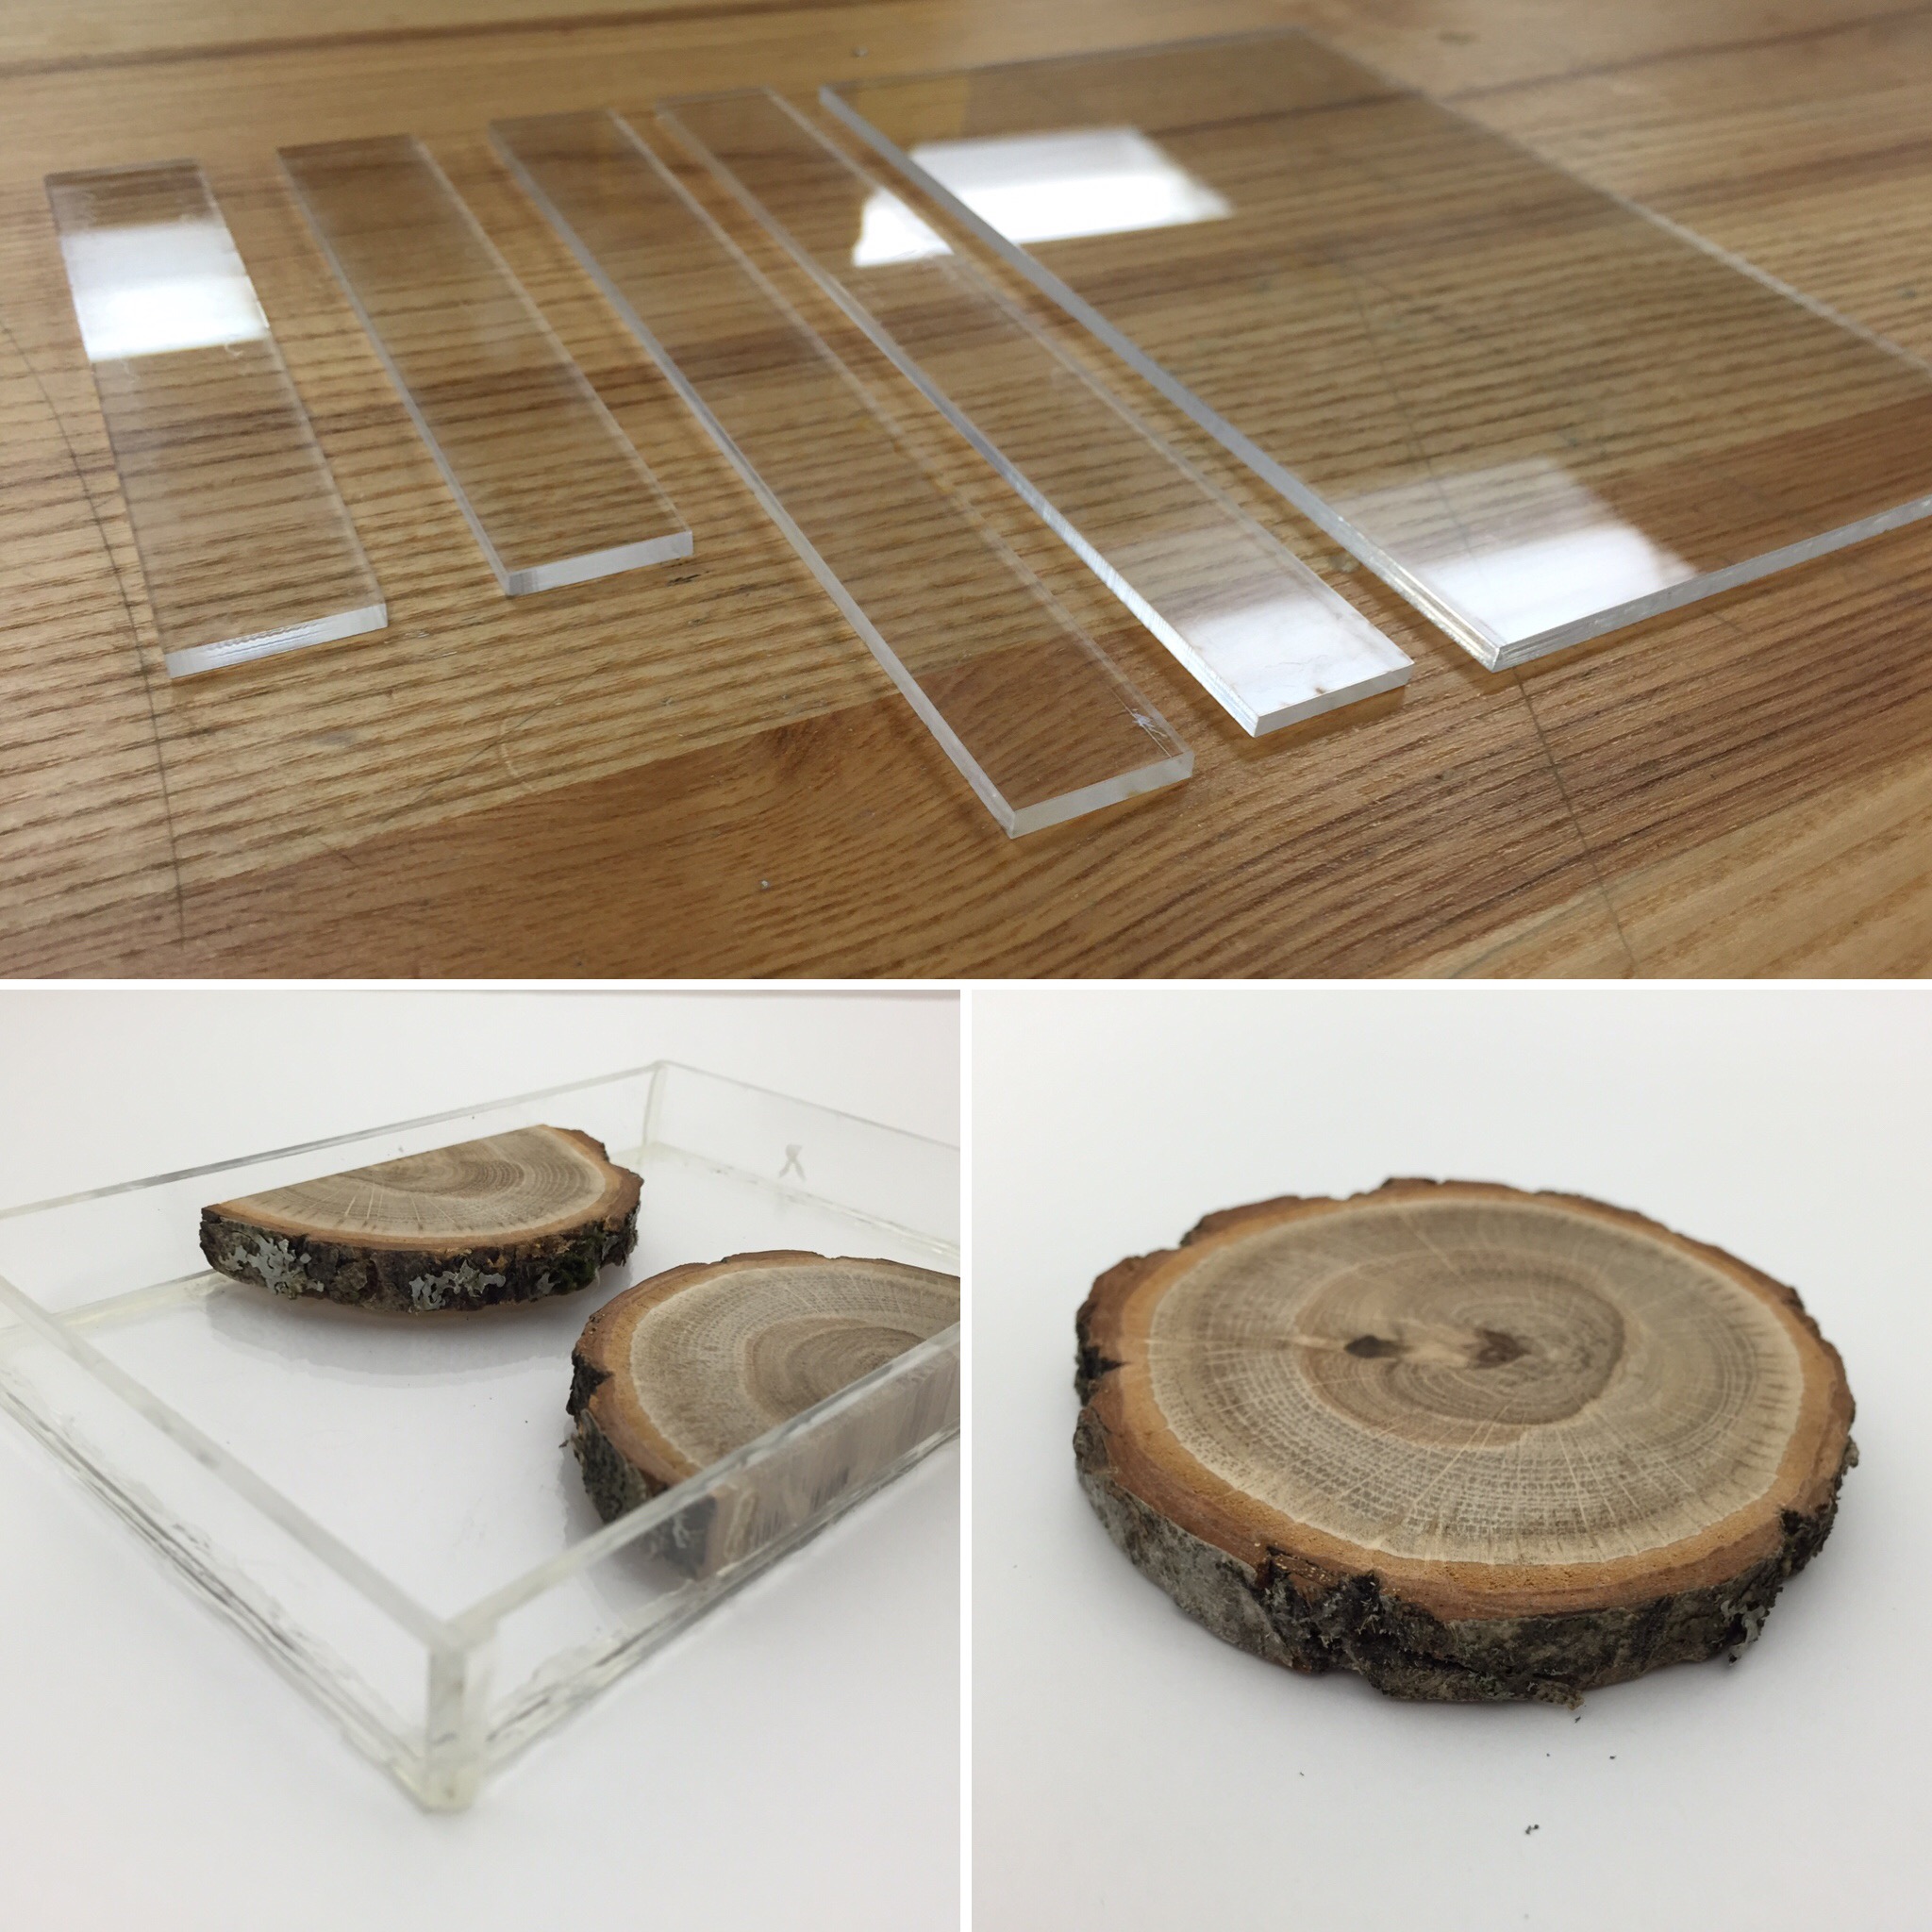
Acrylic + Wood
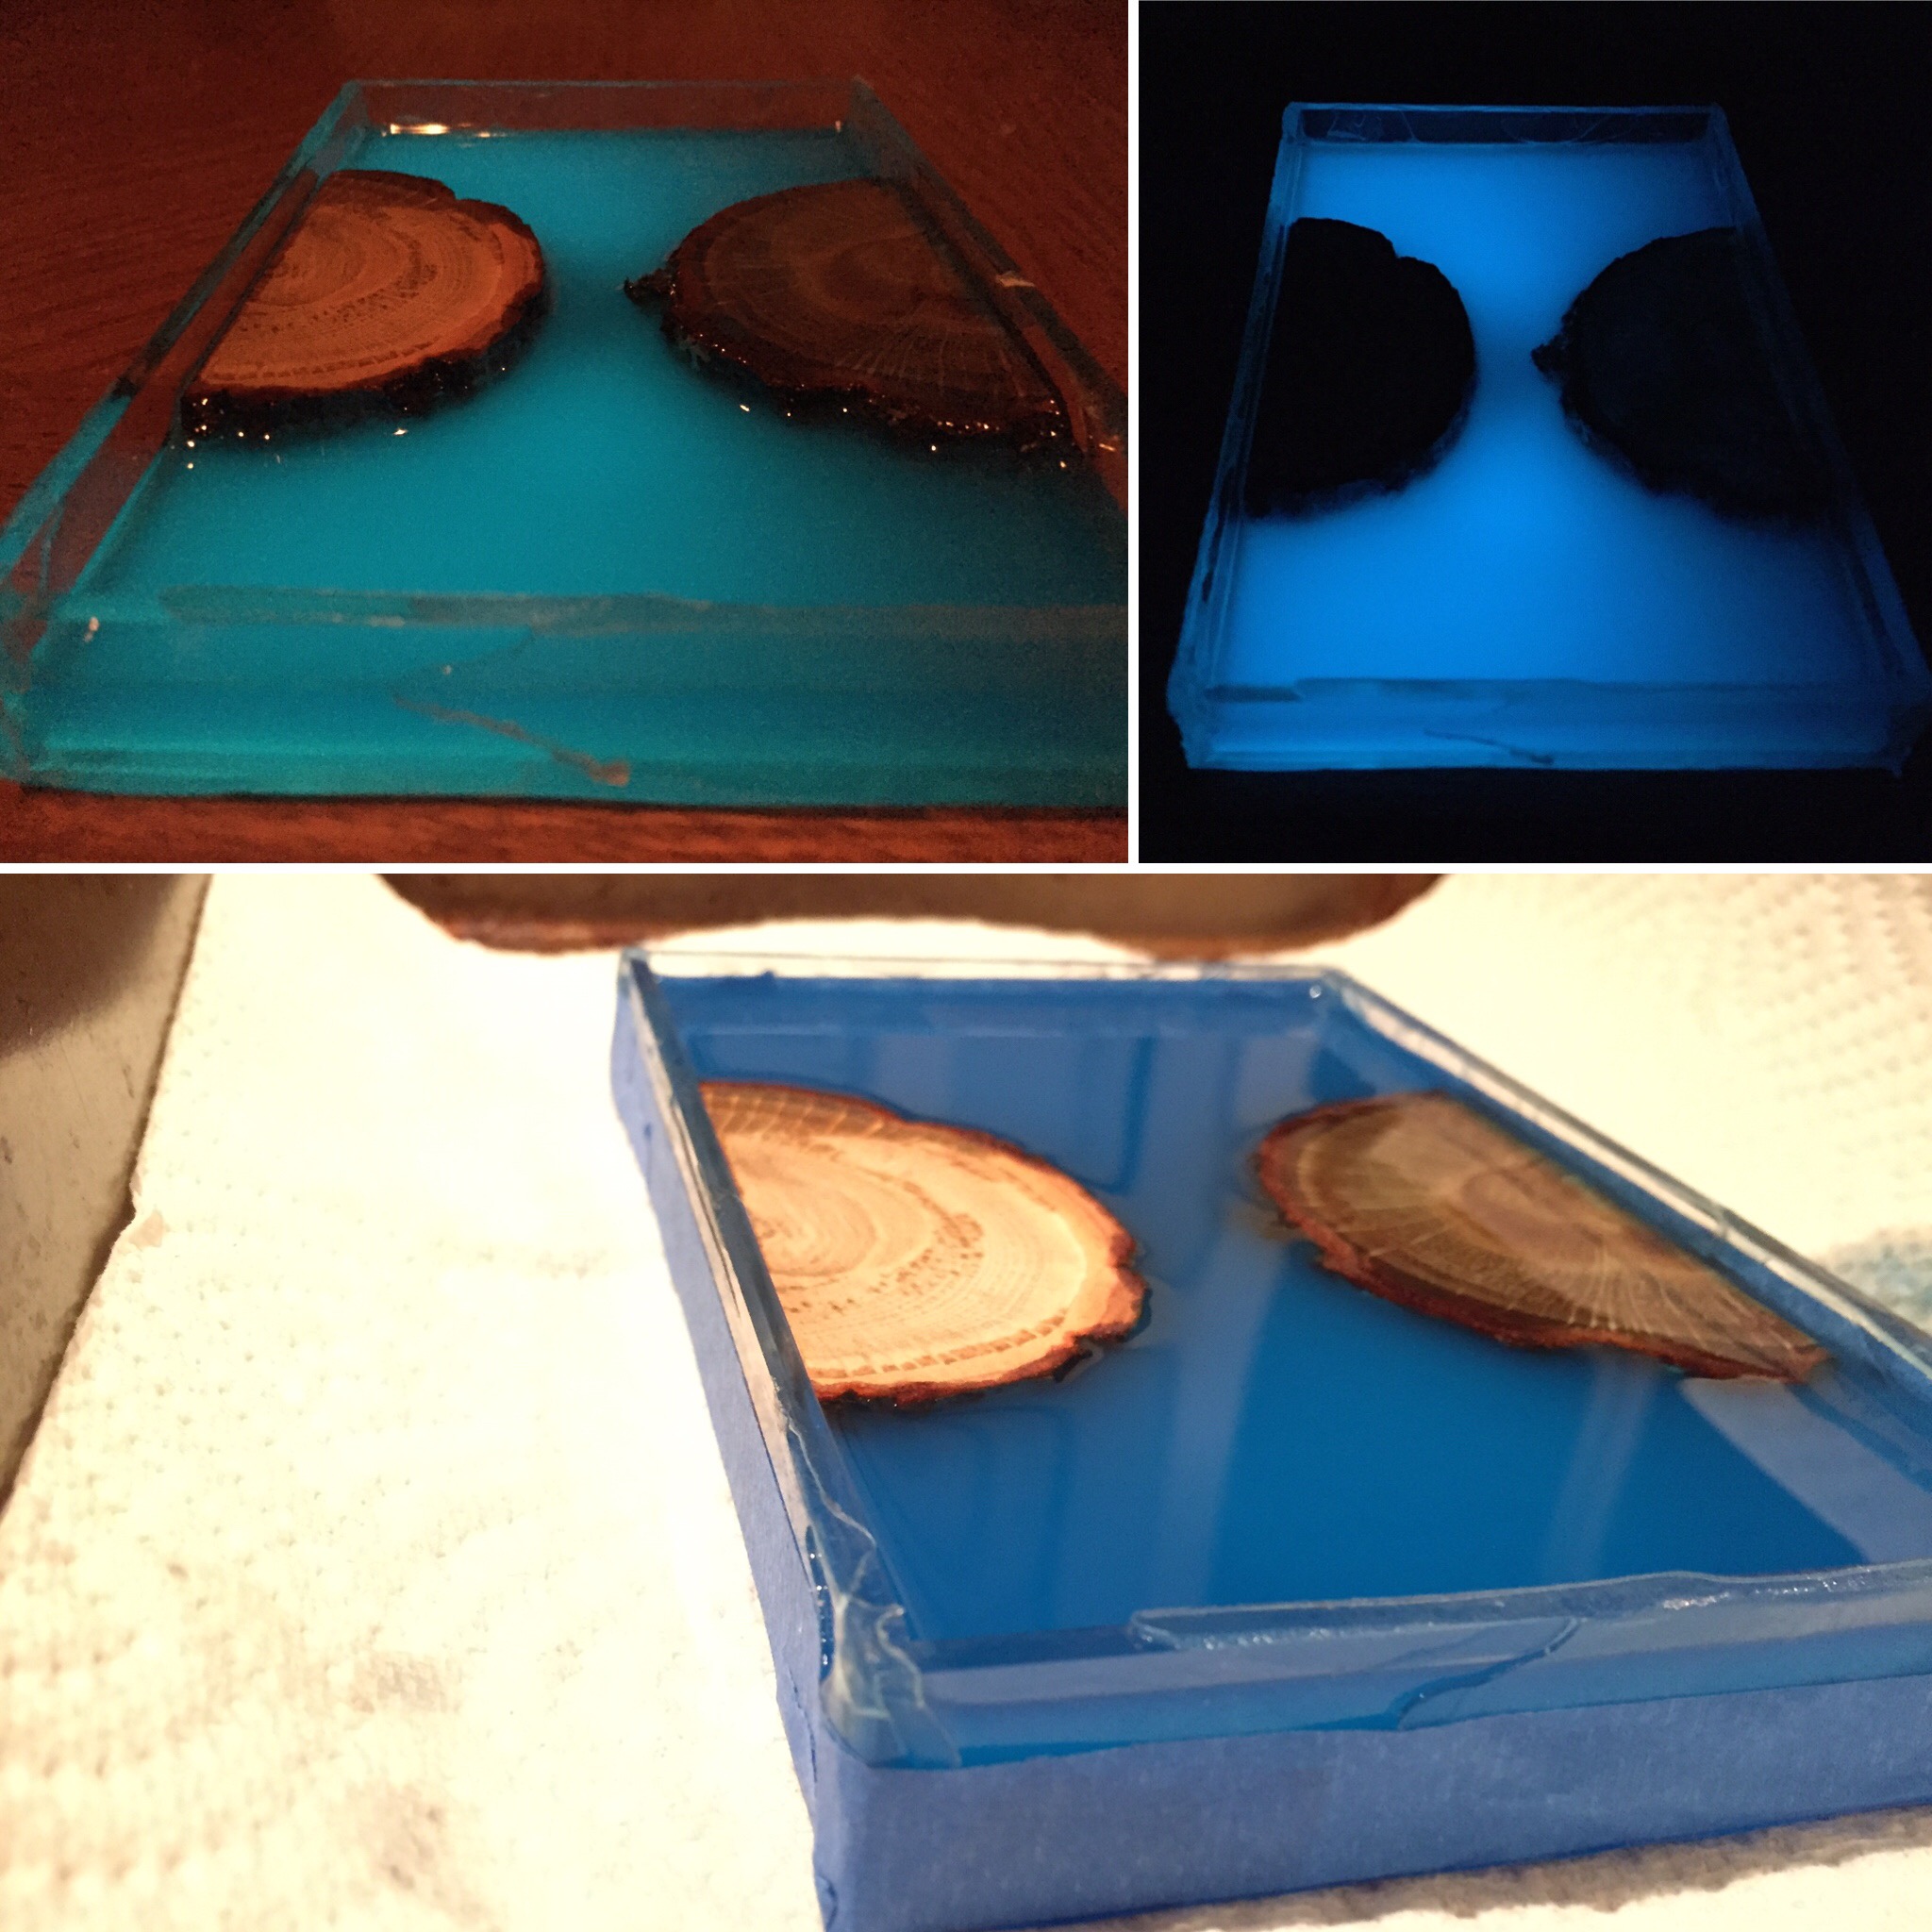
Crystal Resin & Triple-Glow Powder
This powder colors the resin beautifully and fluoresces very bright after absorbing sunlight. I loved the idea of a bright blue and natural oak contrast!
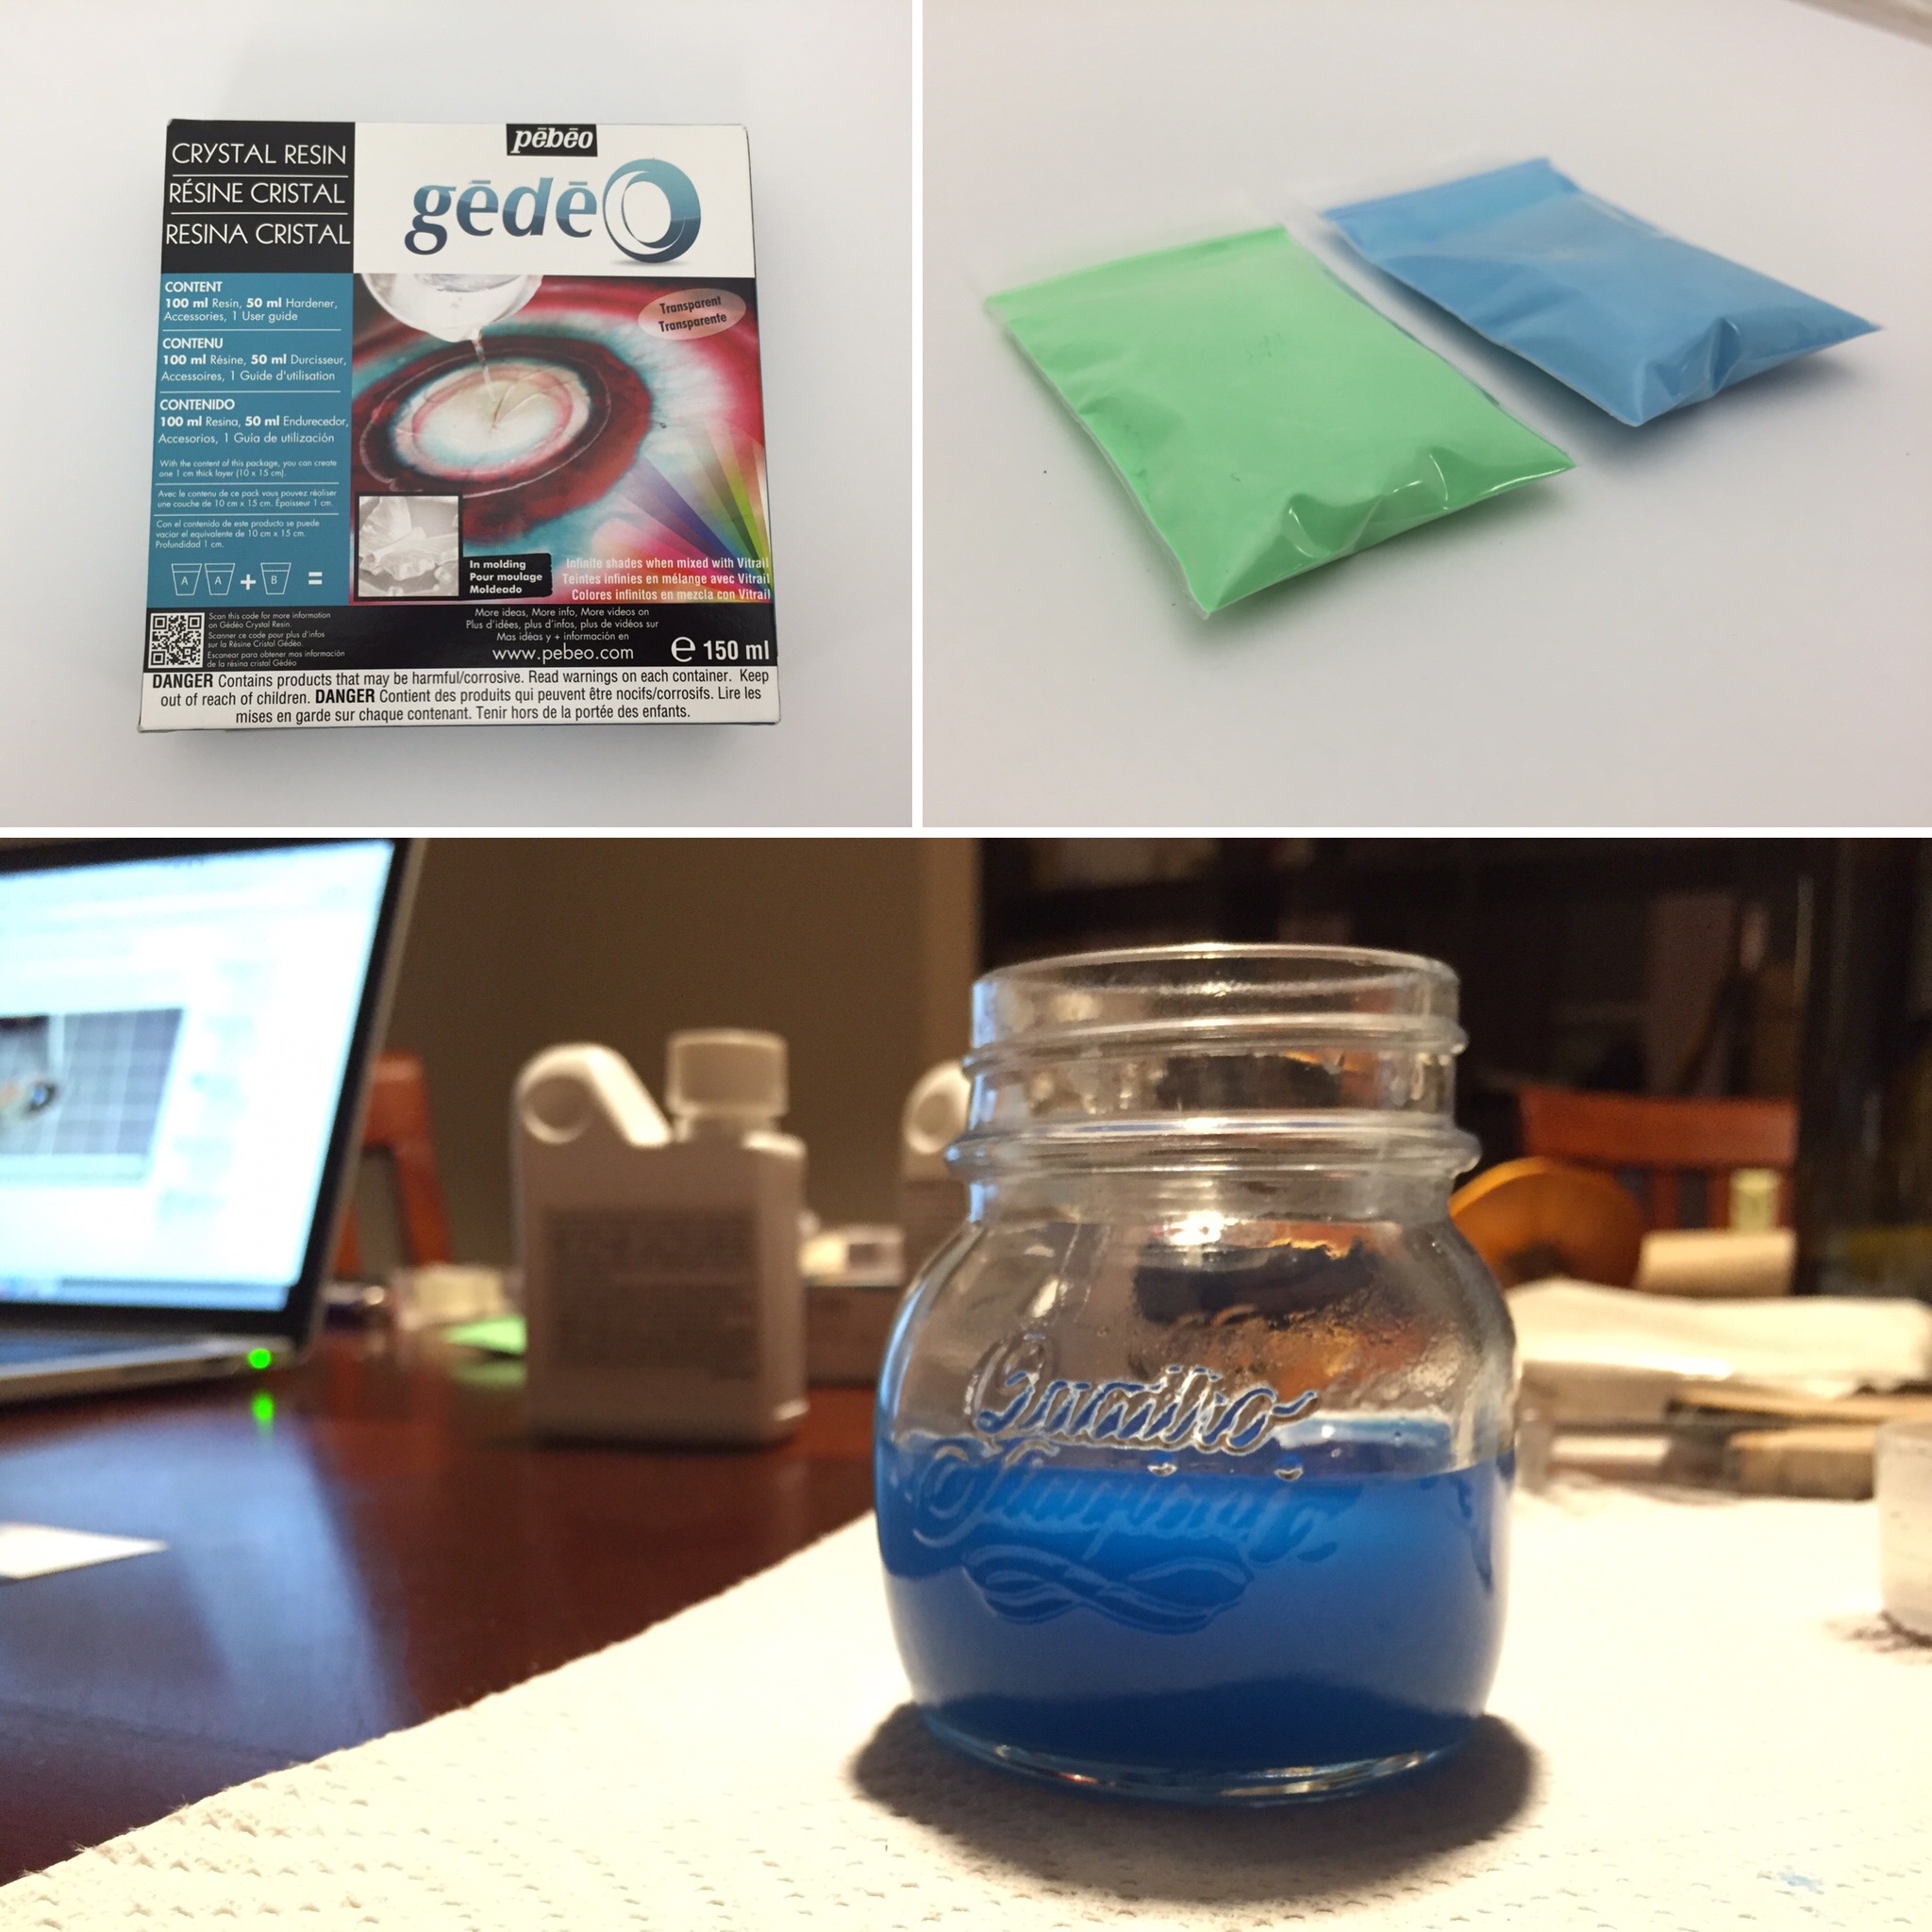
Pro-tip: you can use a hair dryer to heat up the resin and remove bubbles
Preparing for the 2nd Pour
My initial pour wasn't quite high enough, so I had to make a second batch of the resin. Ideally, this would've been done in a single pour. I also accidentally spilled some resin on the oak and it came out beautifully both visually and texture-wise; perhaps there is some way to purposefully get that final glaze look after shaping.
I don't know what to write here... yet
Releasing the Resin Cast
Used a hammer & chisel to gently break the resin out of its cast. You can see the separation caused by the two individual resin pours.
Hammer time!
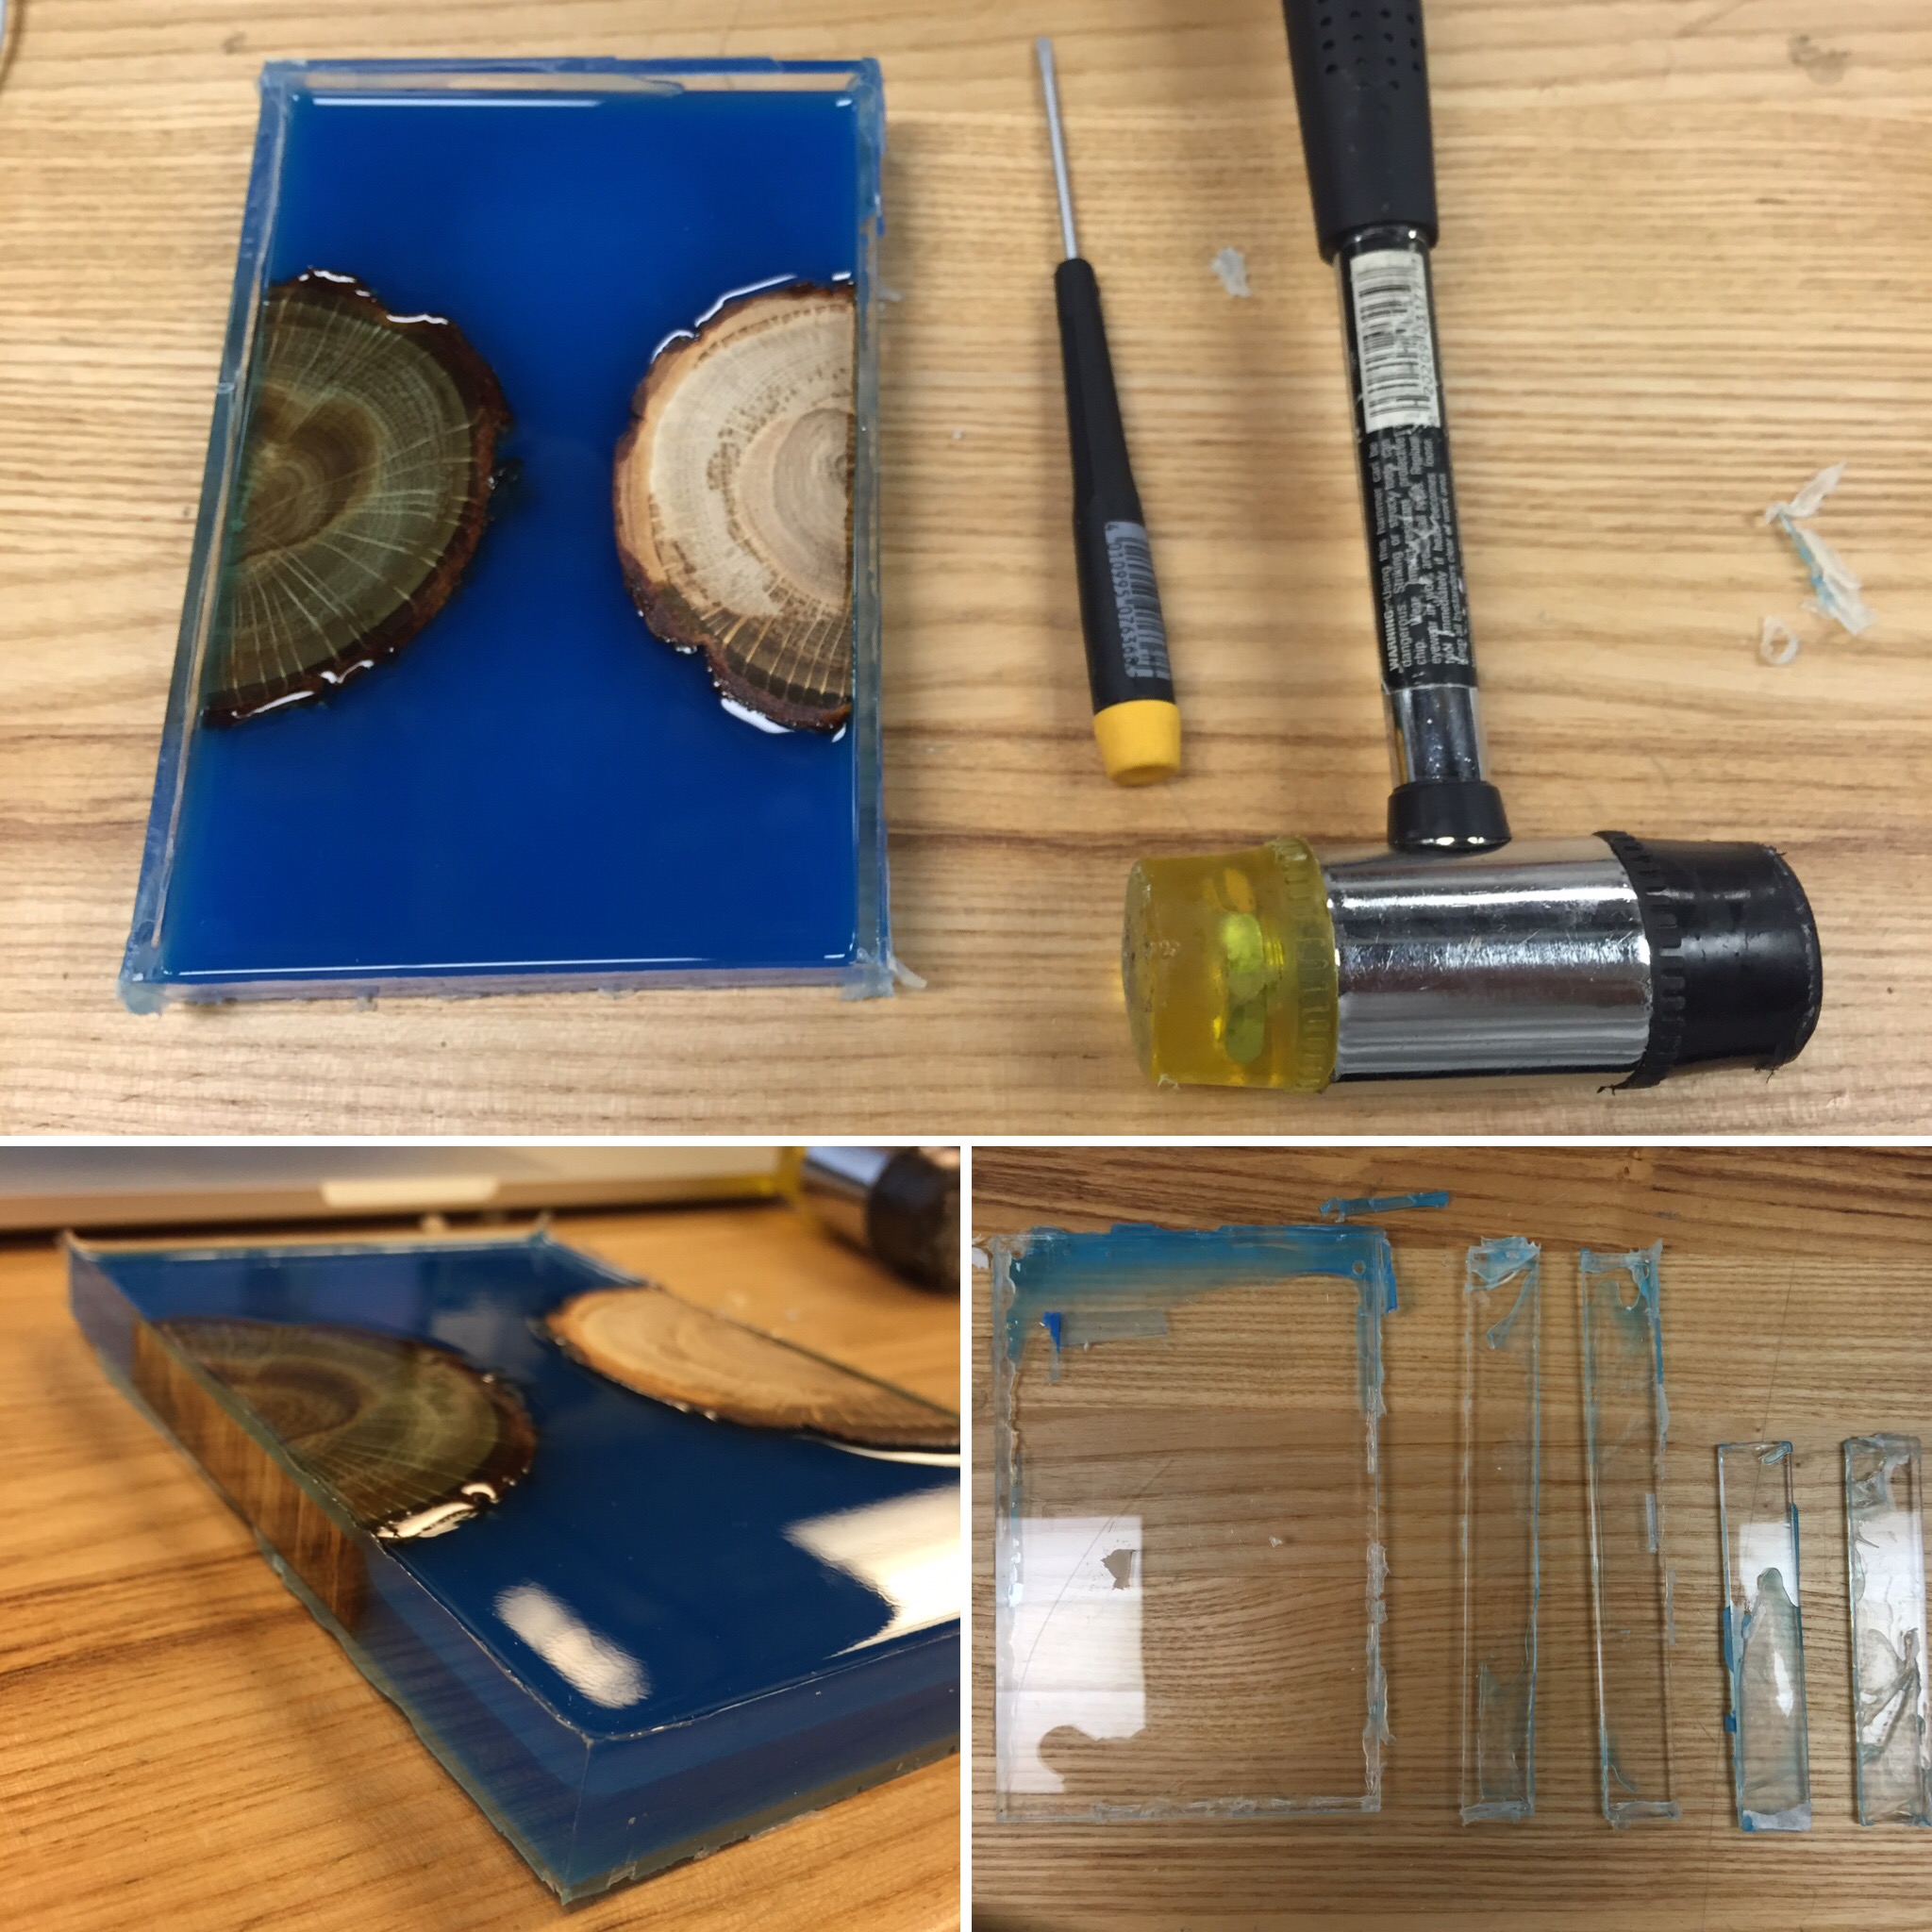
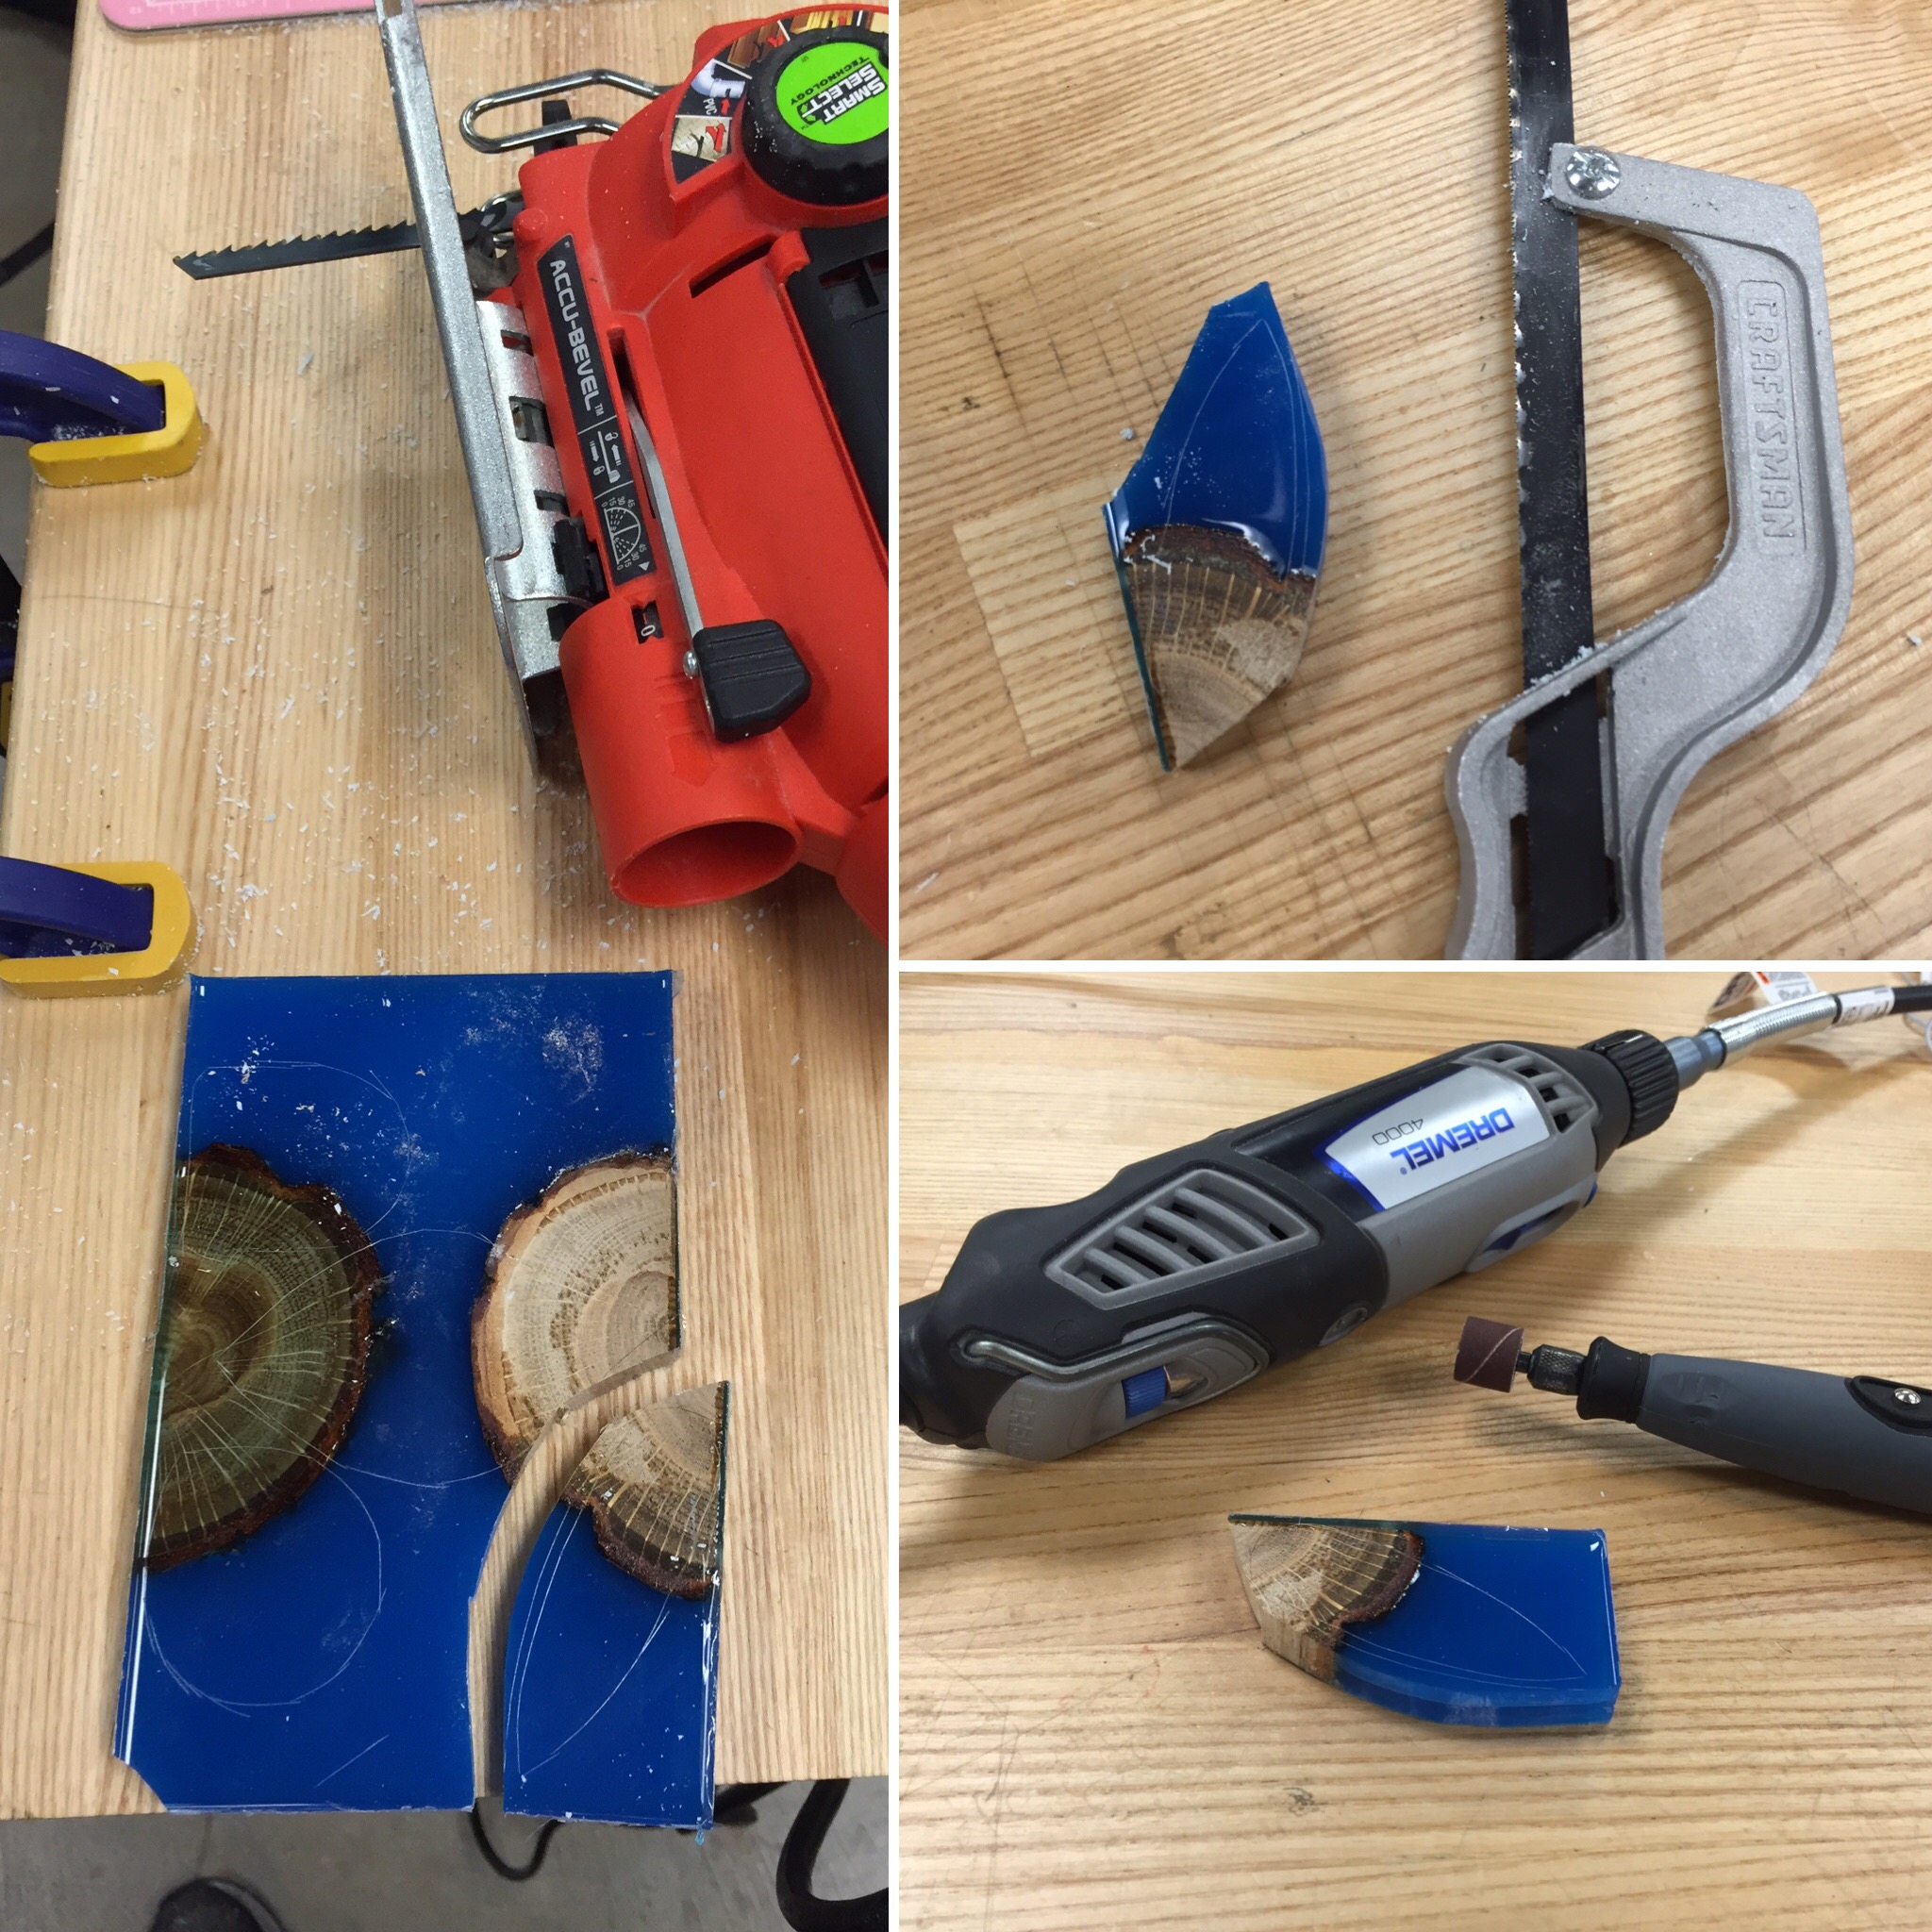
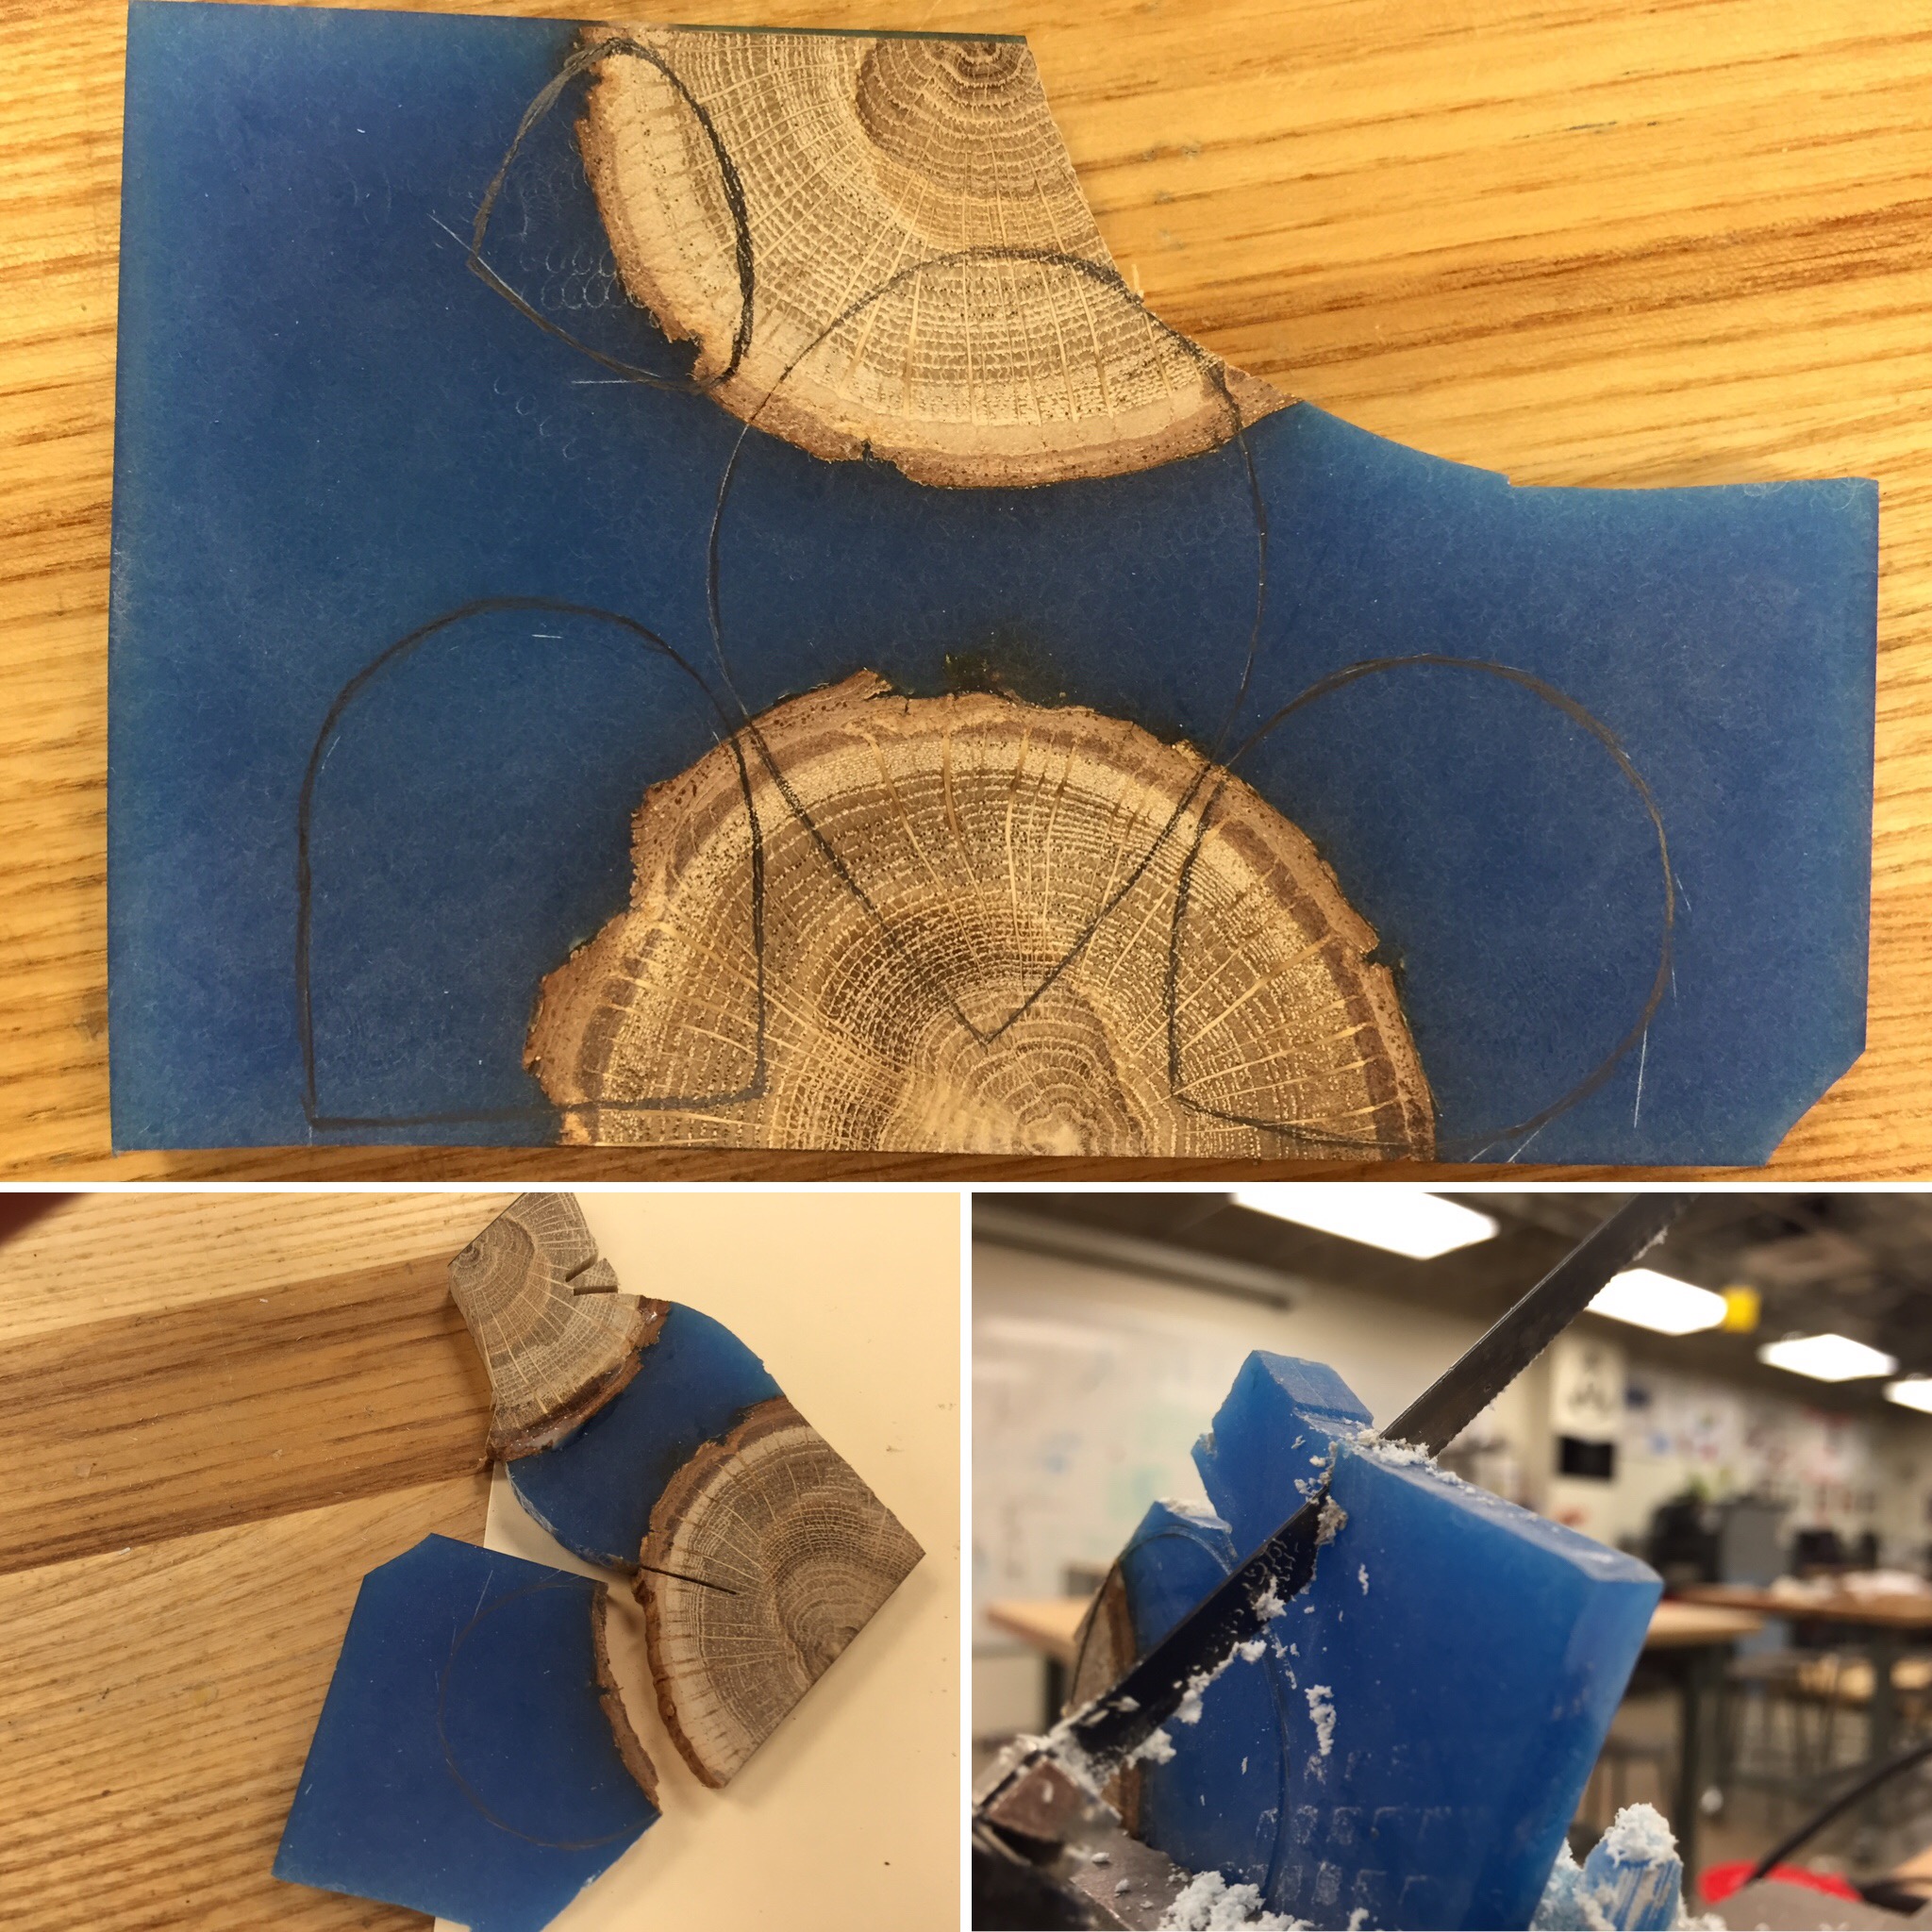
Shaping the Pieces
At this point, I decided to create multiple pieces! Tried out a few different designs, and began experimenting different ways to shape it. This was an incredibly difficult and tedious trial-and-error exploration, and I learned a lot throughout the process.
Just keep cutting, just keep cutting
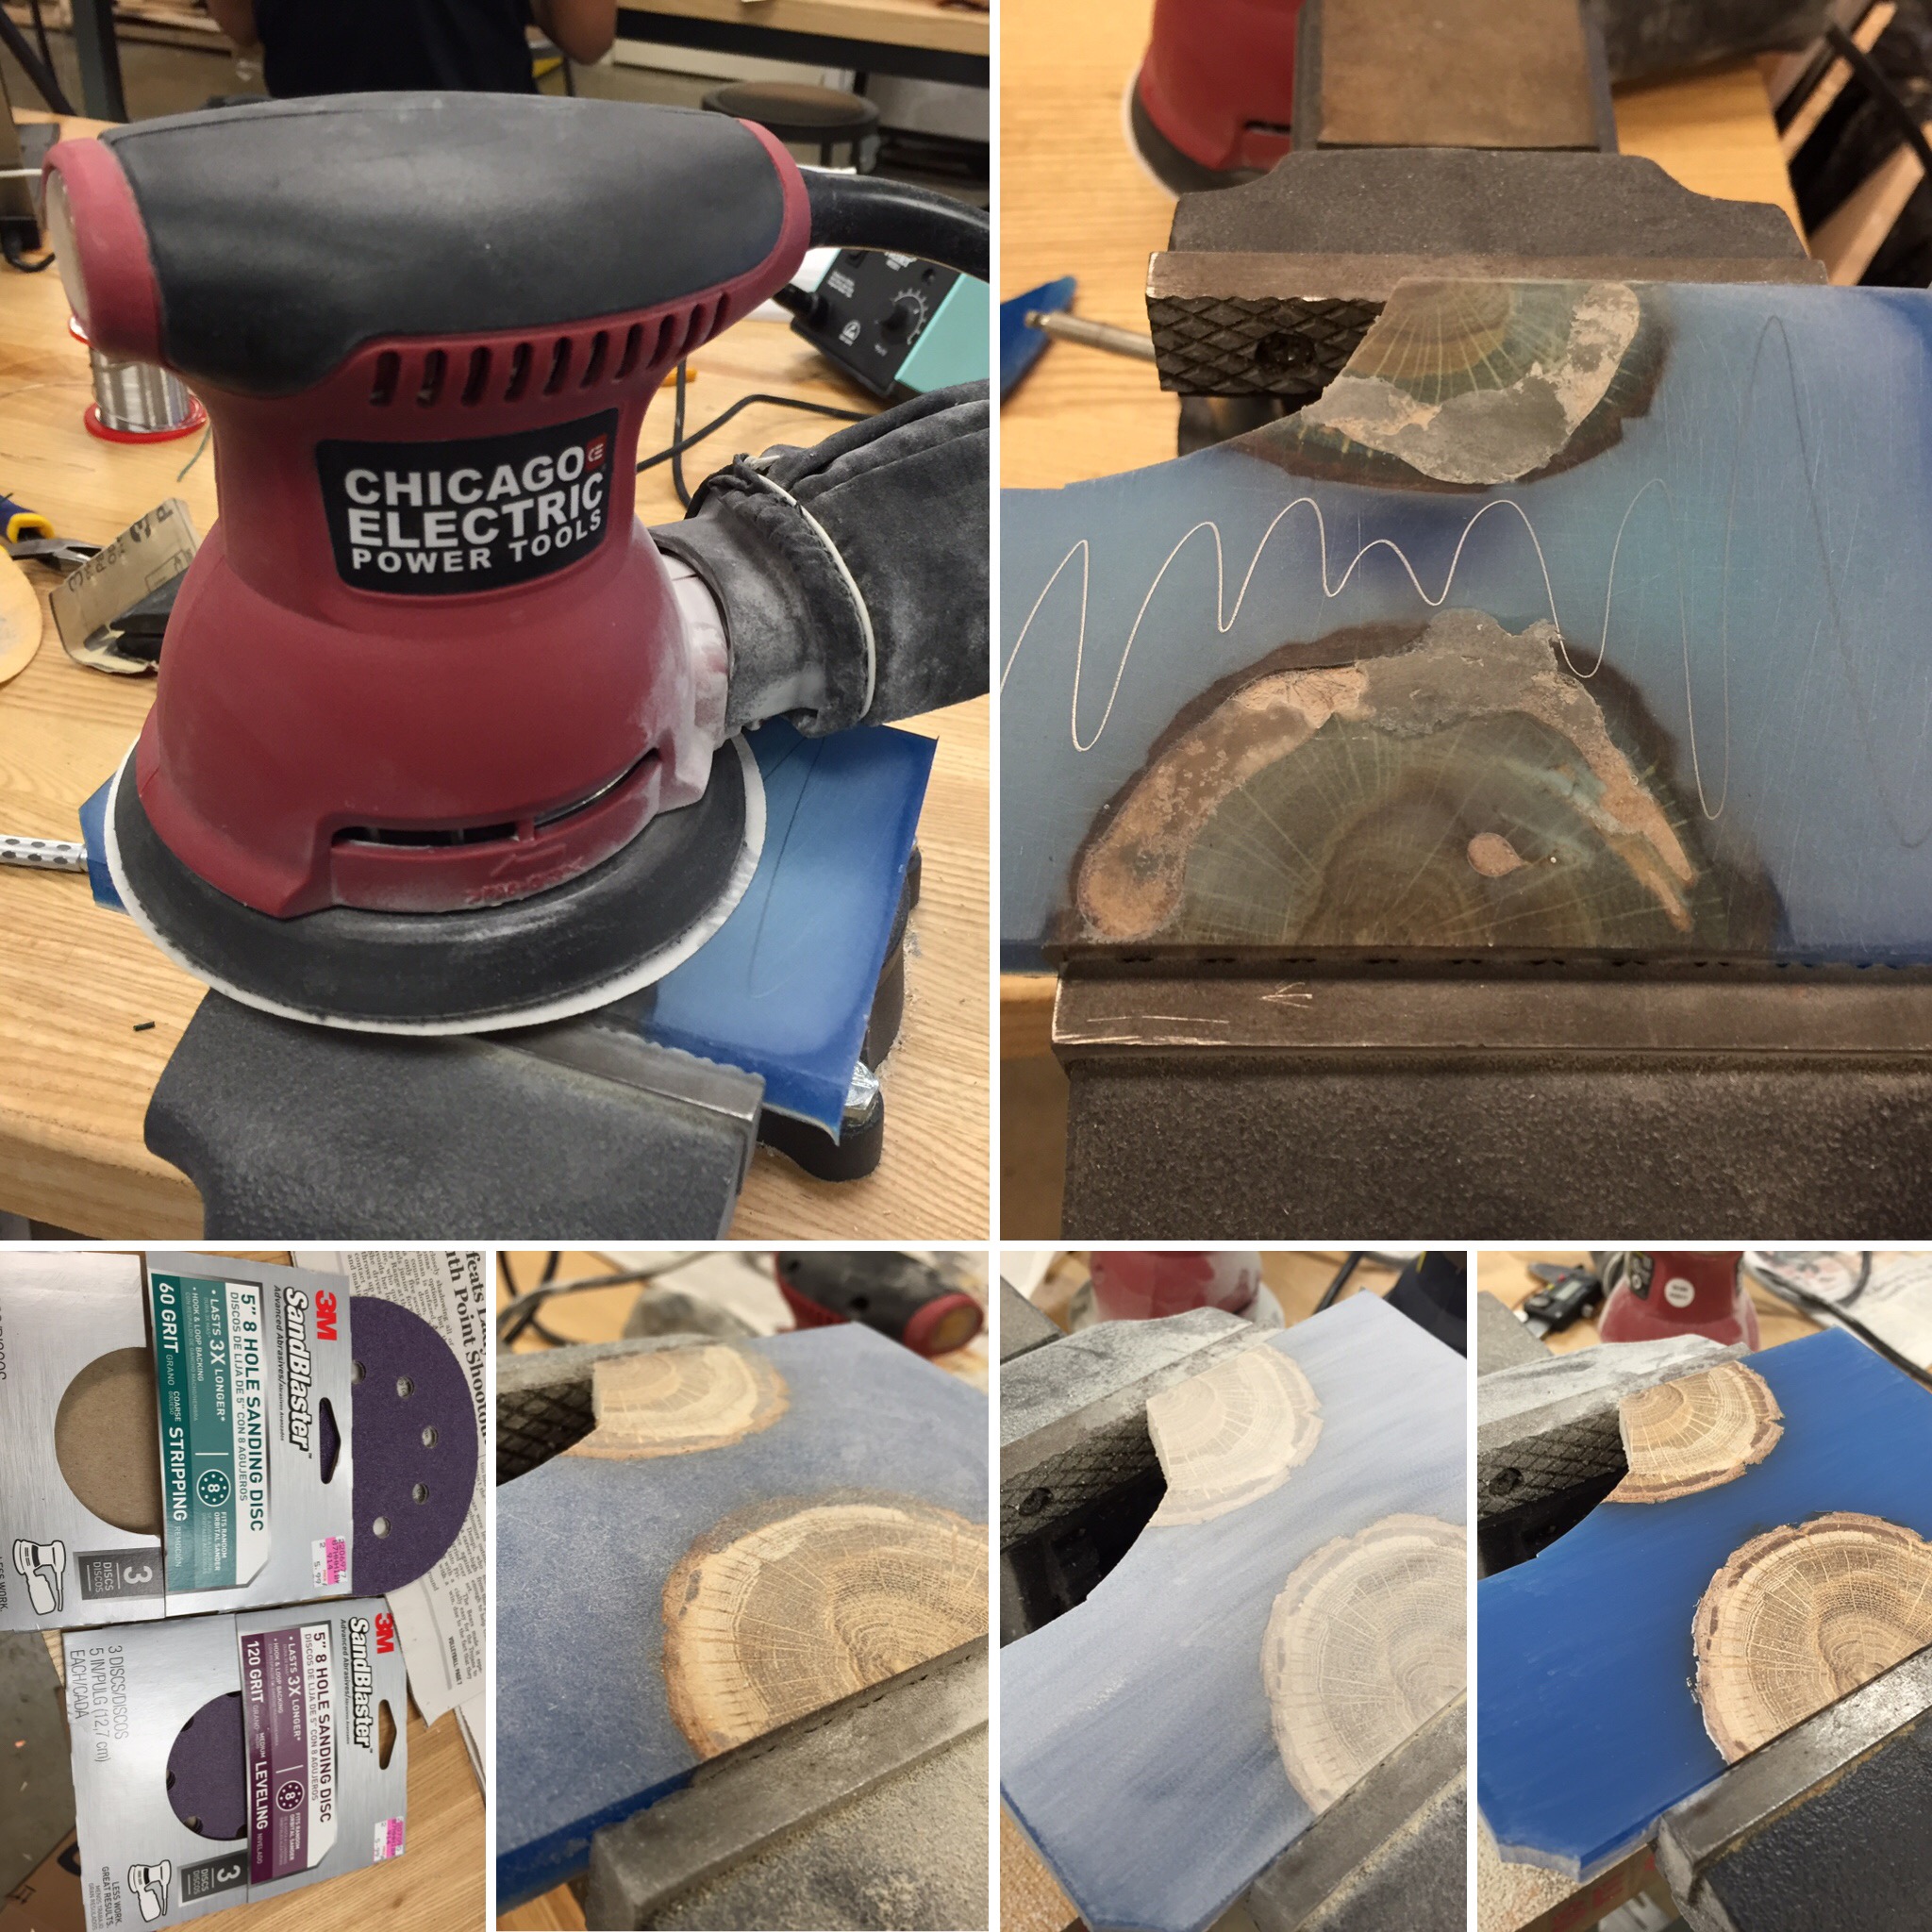
Leveling the Casted Piece
There was a cloudy layer of resin residue on the underside of the casted piece that I decided to remove. Used very low grit sandpaper on a random orbital sander to achieve this.
This is probably the most sanding I've ever had to do in my life
Shaping the Pieces II
After sanding, it was a lot easier to mark up the pieces, so I finalized the shapes I wanted to make. Using the jigsaw on small pieces that were clamped snapped a piece or two (as pictured) so I decided to instead get the basic shape through a handsaw instead. Thanks to wood glue, I was able to salvage the broken pieces!
Just keep shaping, just keep shaping
Shaping the Pieces III
After cutting the pieces, I used a Dremel to get the shape I was roughly aiming for and an orbital finishing sander to get the smooth curved edges I desired!

**In the tune of Super Mario Bros. underground theme** Dremel, dremel, dremel
Finished Shaping the Pieces
I was very satisfied with the final shapes - time for polishing!
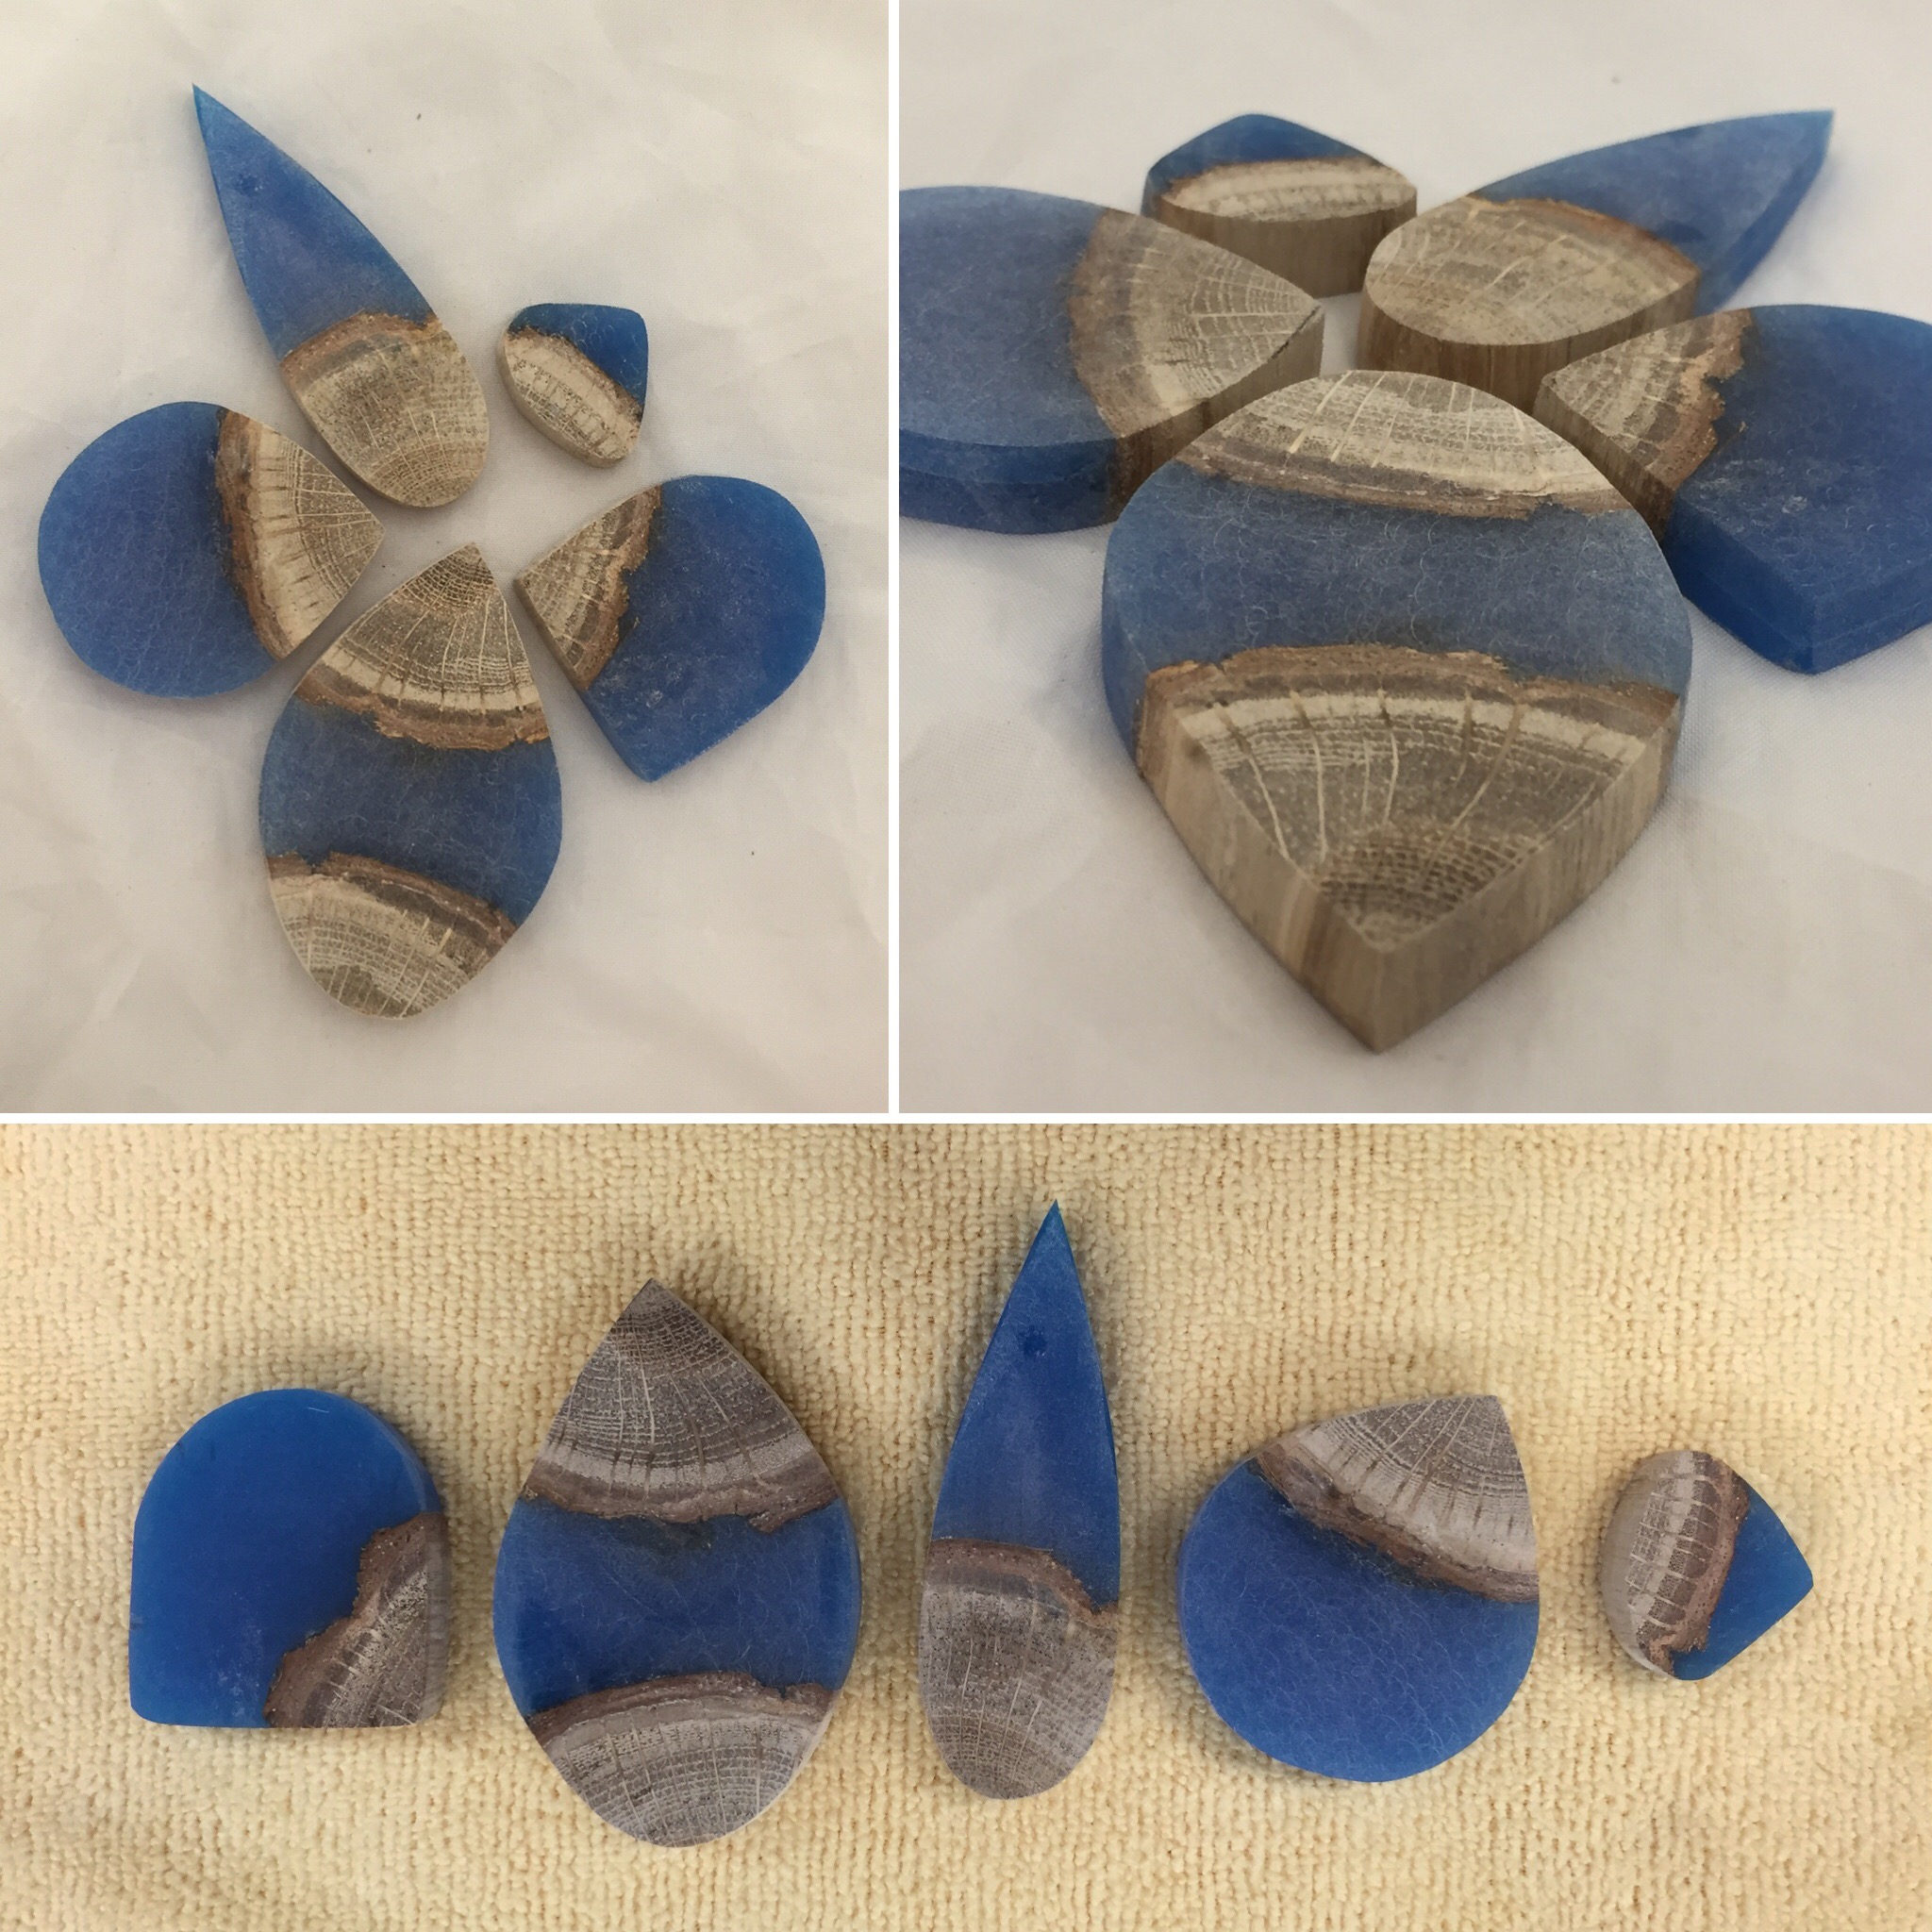
In my opinion, the pieces look super cool pieced together like a puzzle!
Drilling the Holes
Used a drill press to make holes for the chords and eye bails.
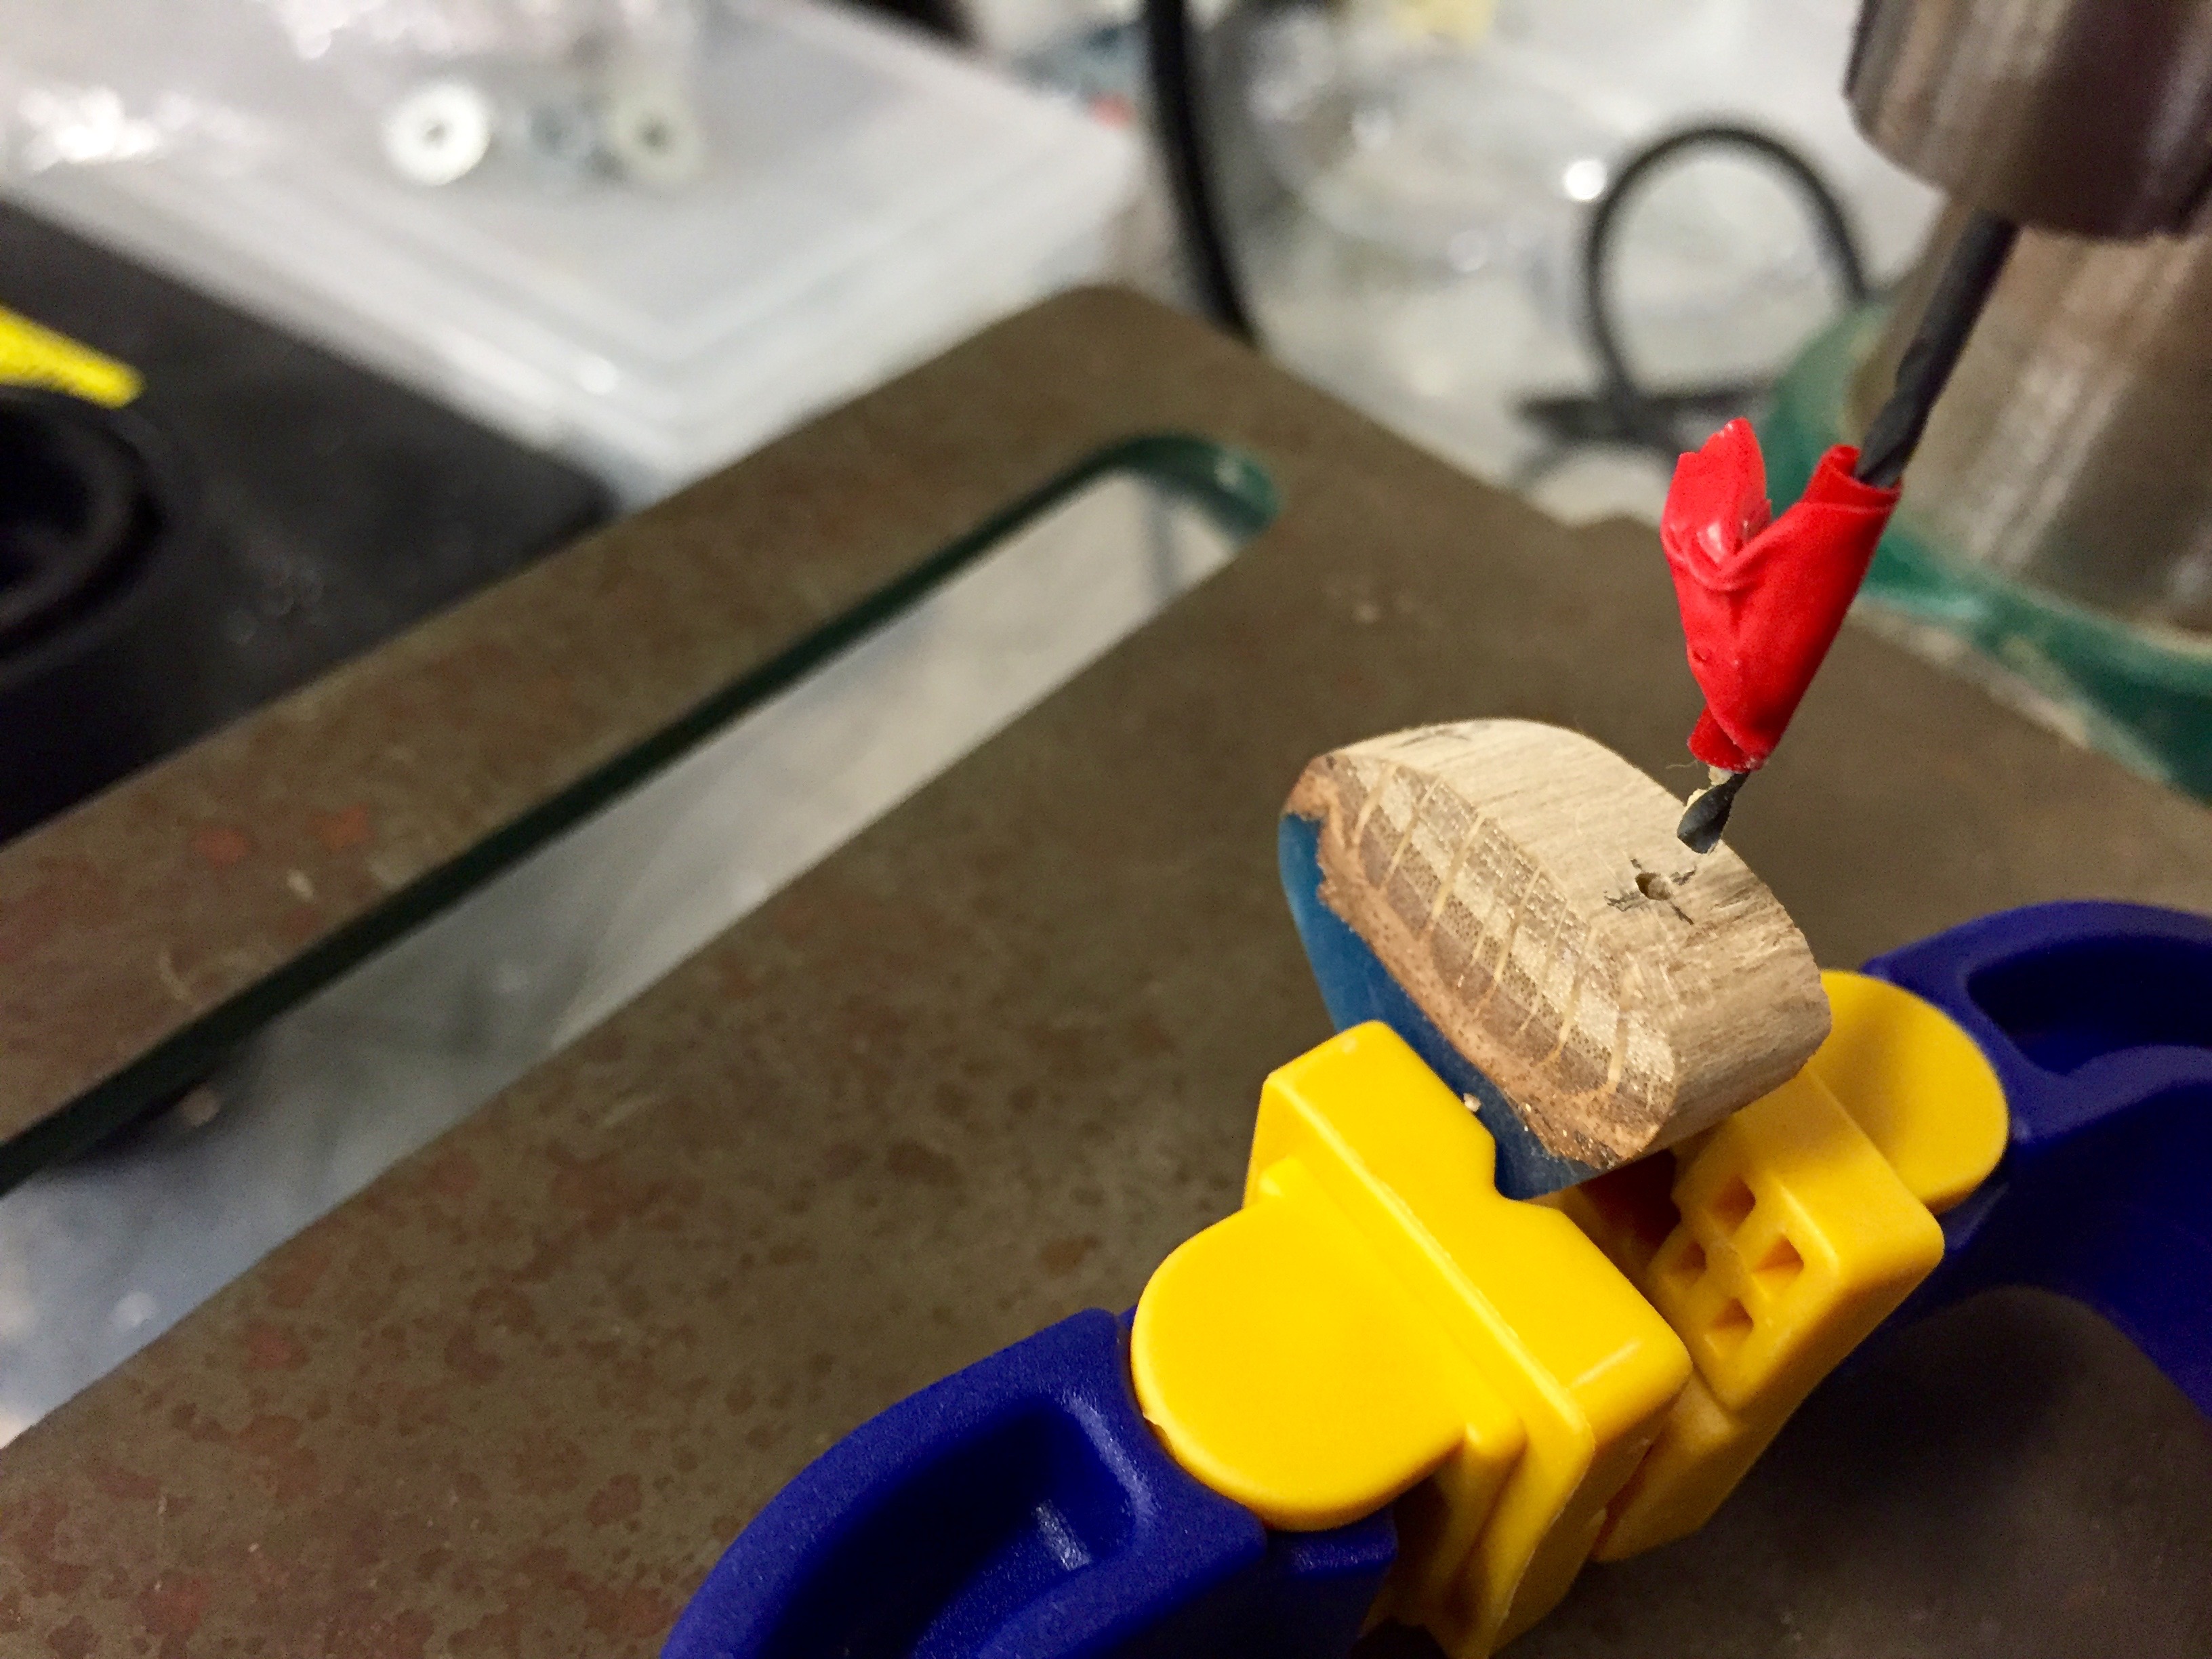
The red tape was used to measure how deep the hole needed to go (super sketch, but it worked)
Cleaning Up the Drill Holes
Re-sanded the pieces to remove the marks for positioning the holes.
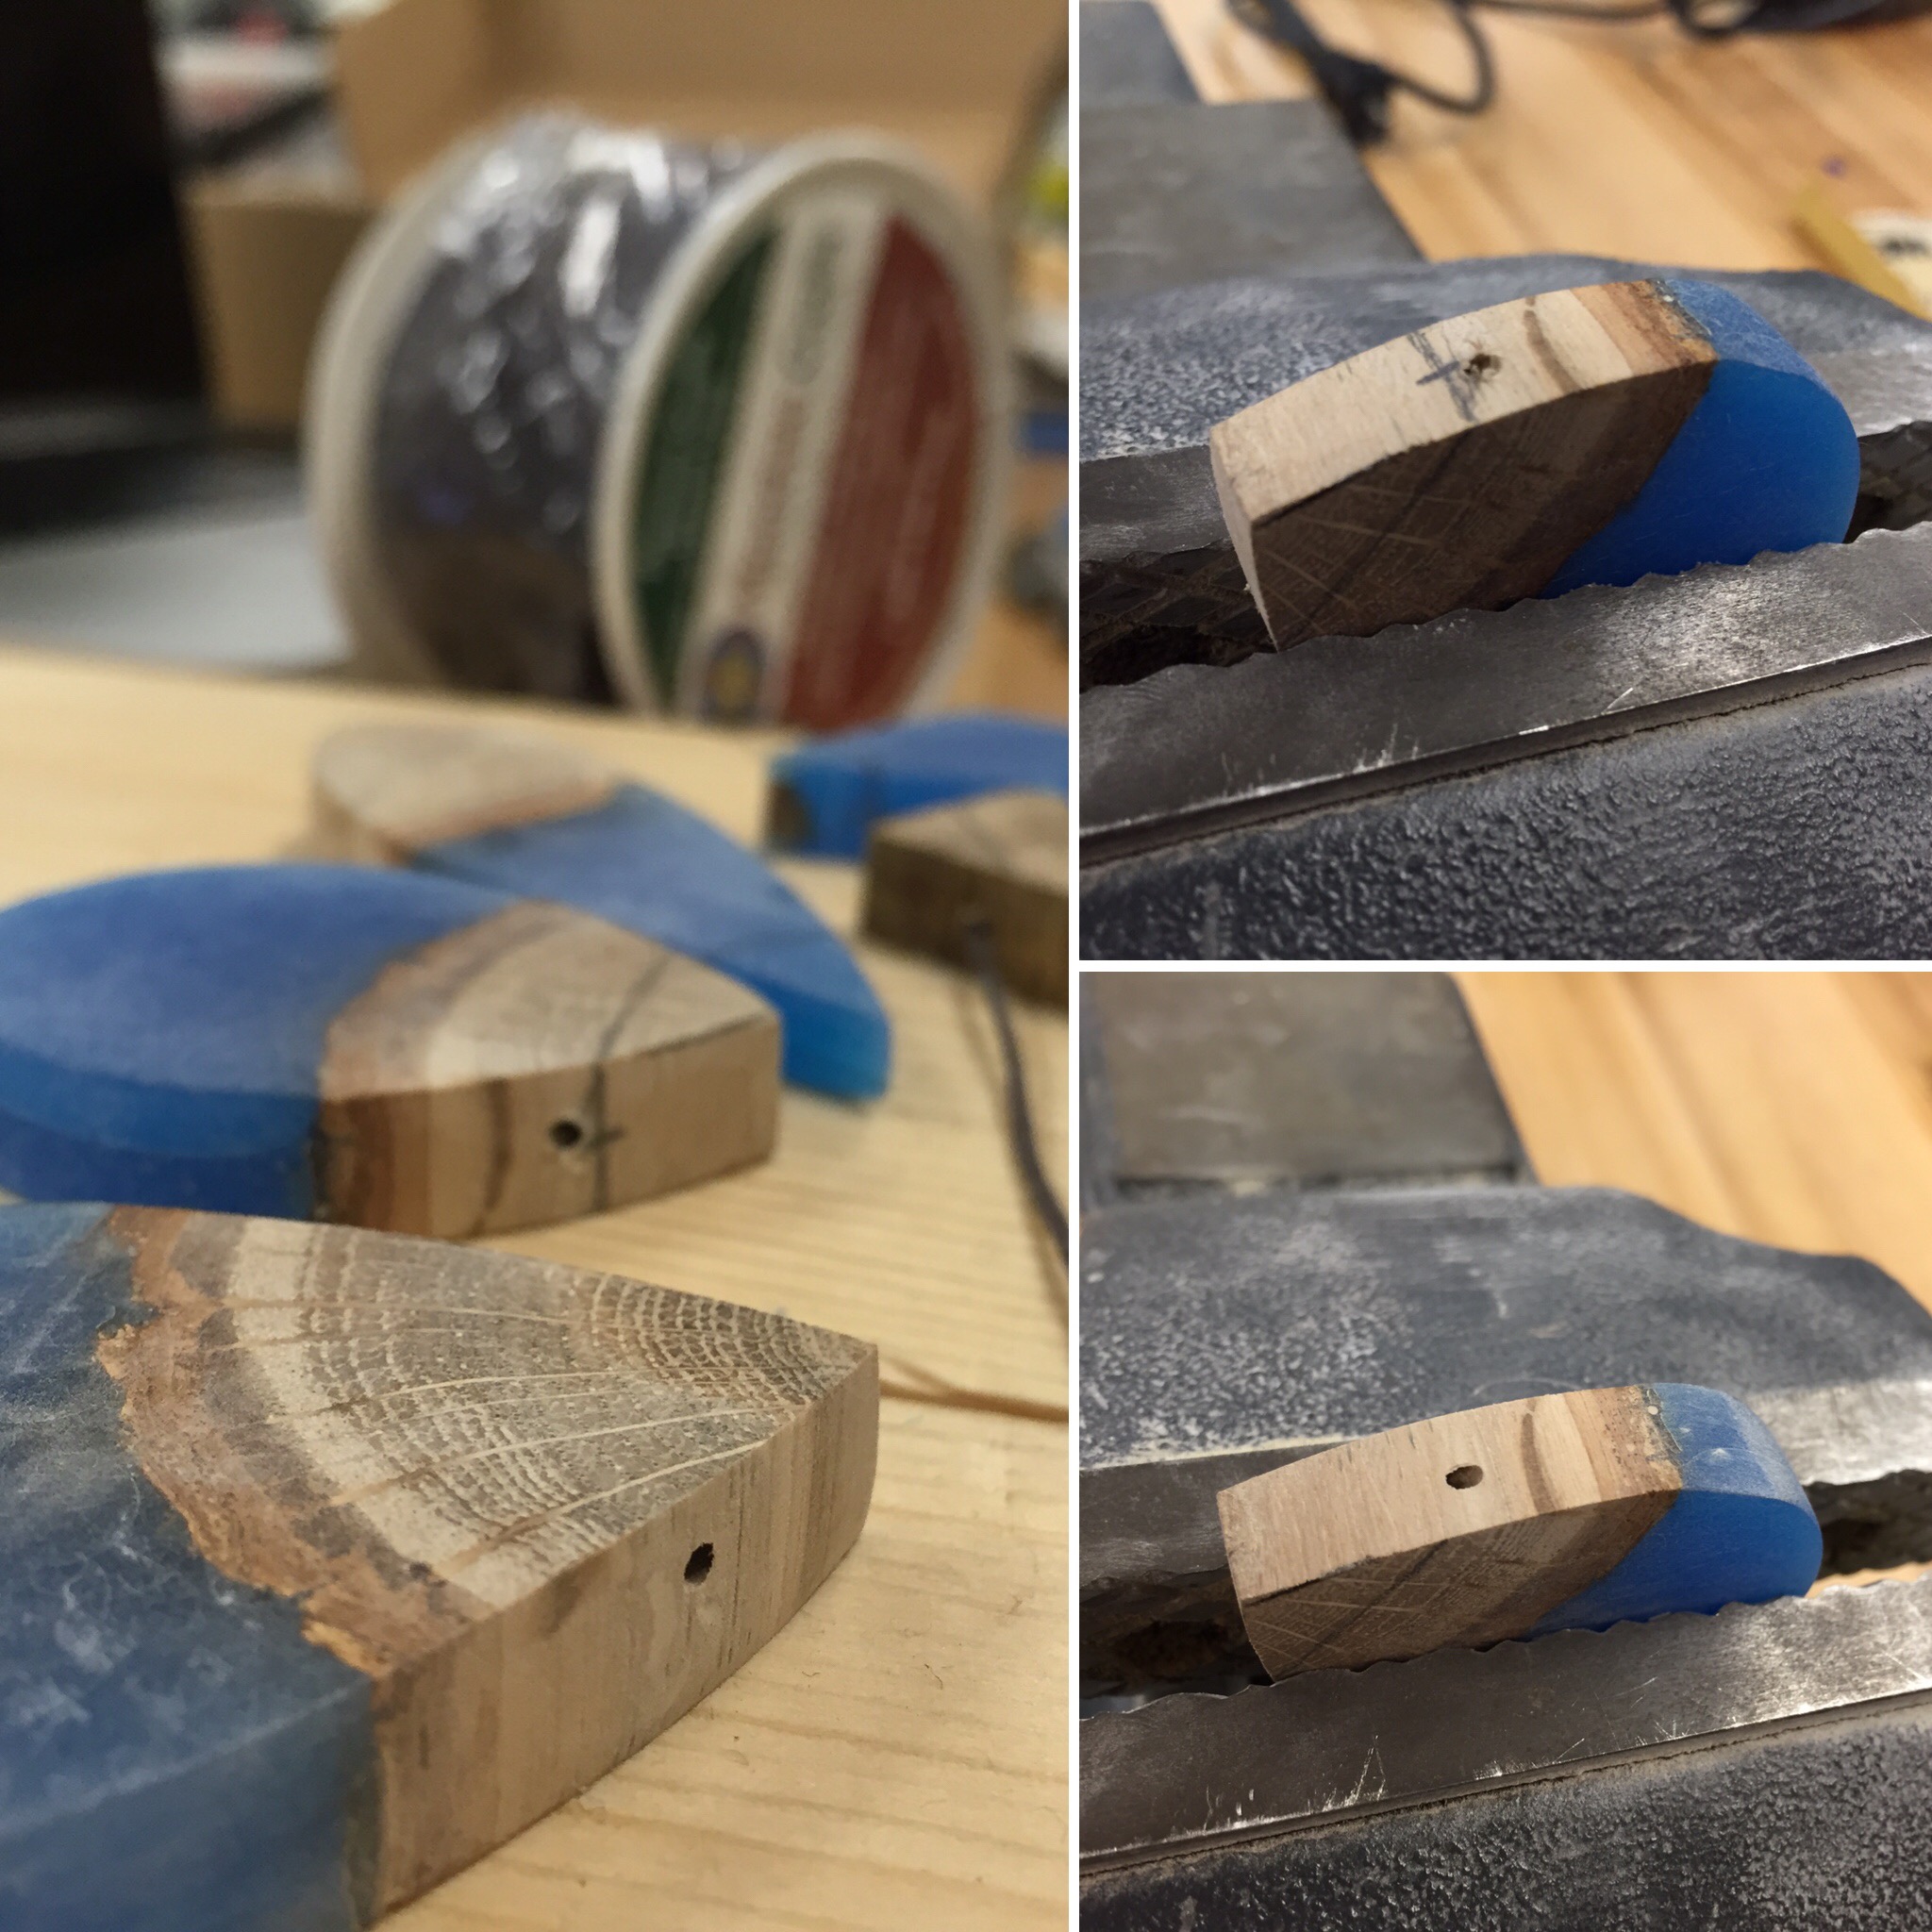
The red tape was used to measure how deep the hole needed to go (super sketch, but it worked)
Sanding & Polishing
I began exploring different ways to sand and gloss the resin. I used a micro-mesh sanding kit to get it as smooth as I could by hand, and then coated it in a layer of boiled linseed oil. Hung in my closet to dry!
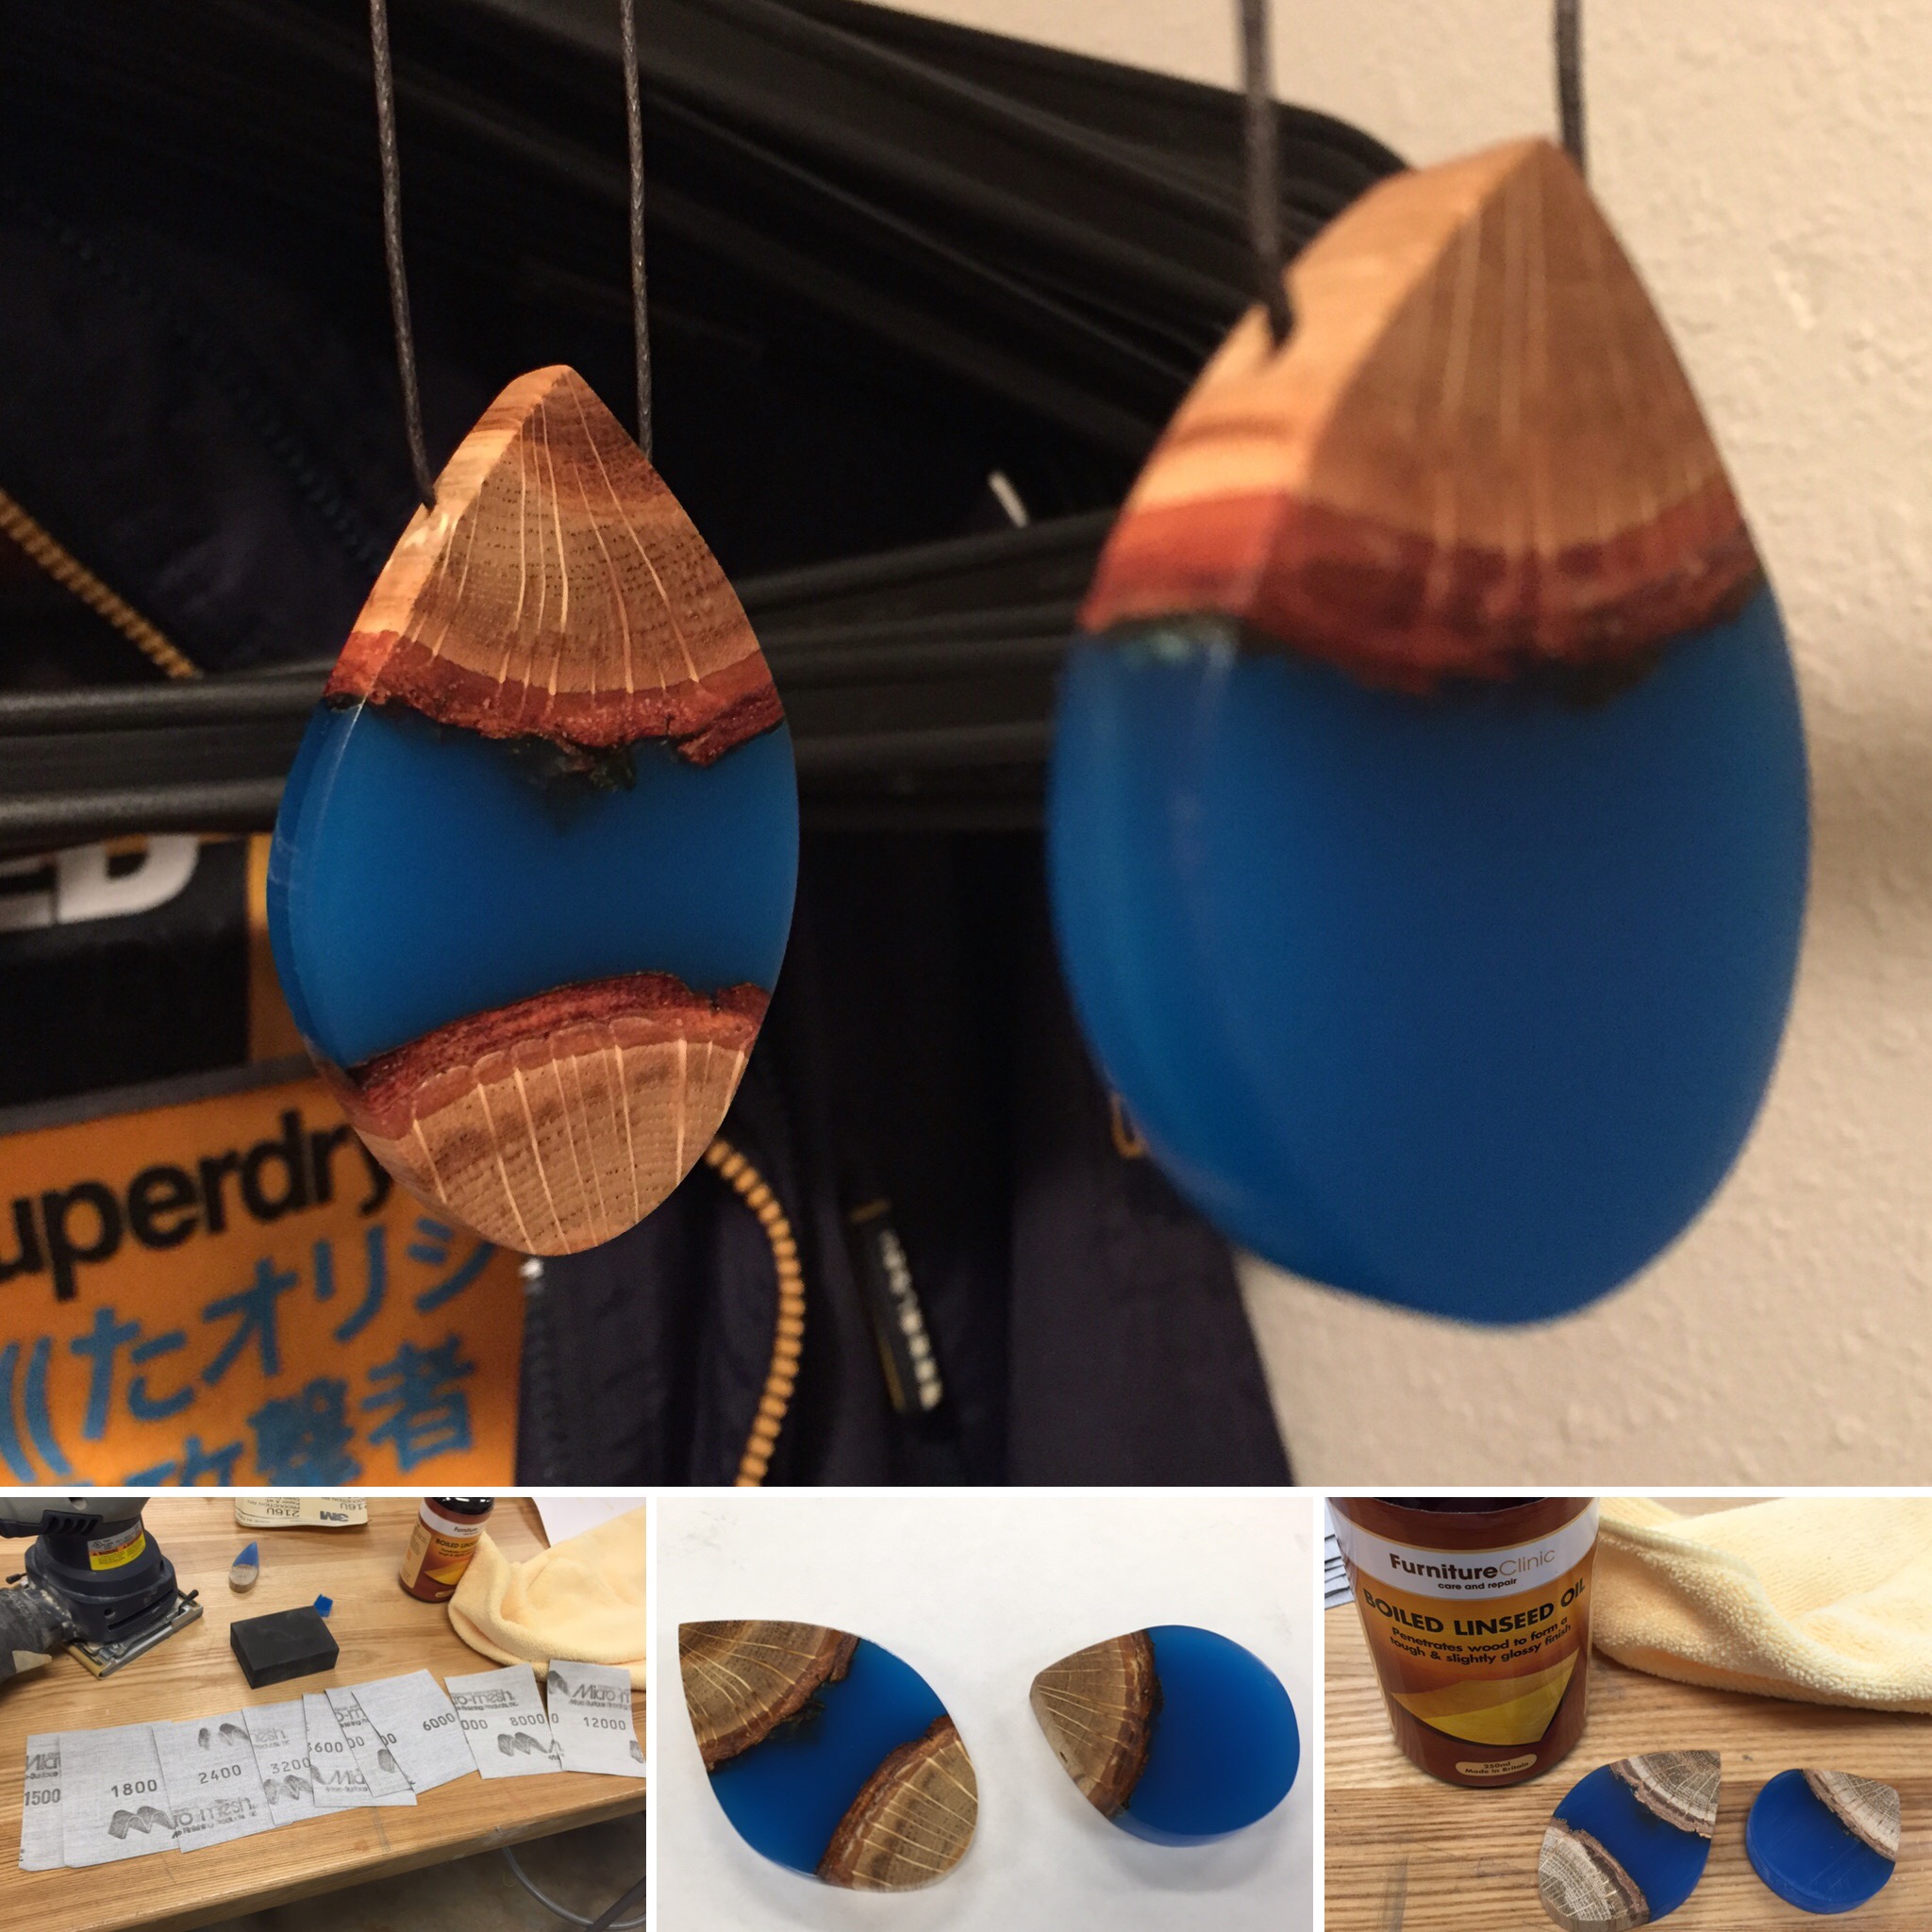
Sandpaper from 150 grit to 12,000 grit was used. You can use white spirit to lighten the linseed oil
Sanding & Polishing II
The resin was incredibly hard to buff to my ideal standard with my given tool set. I explored using the Novus scratch remover #3, #2, and #1 and covered the wood portion in tape to protect it. In retrospect, the tape wasn't necessary as the scratch remover didn't damage the wood.
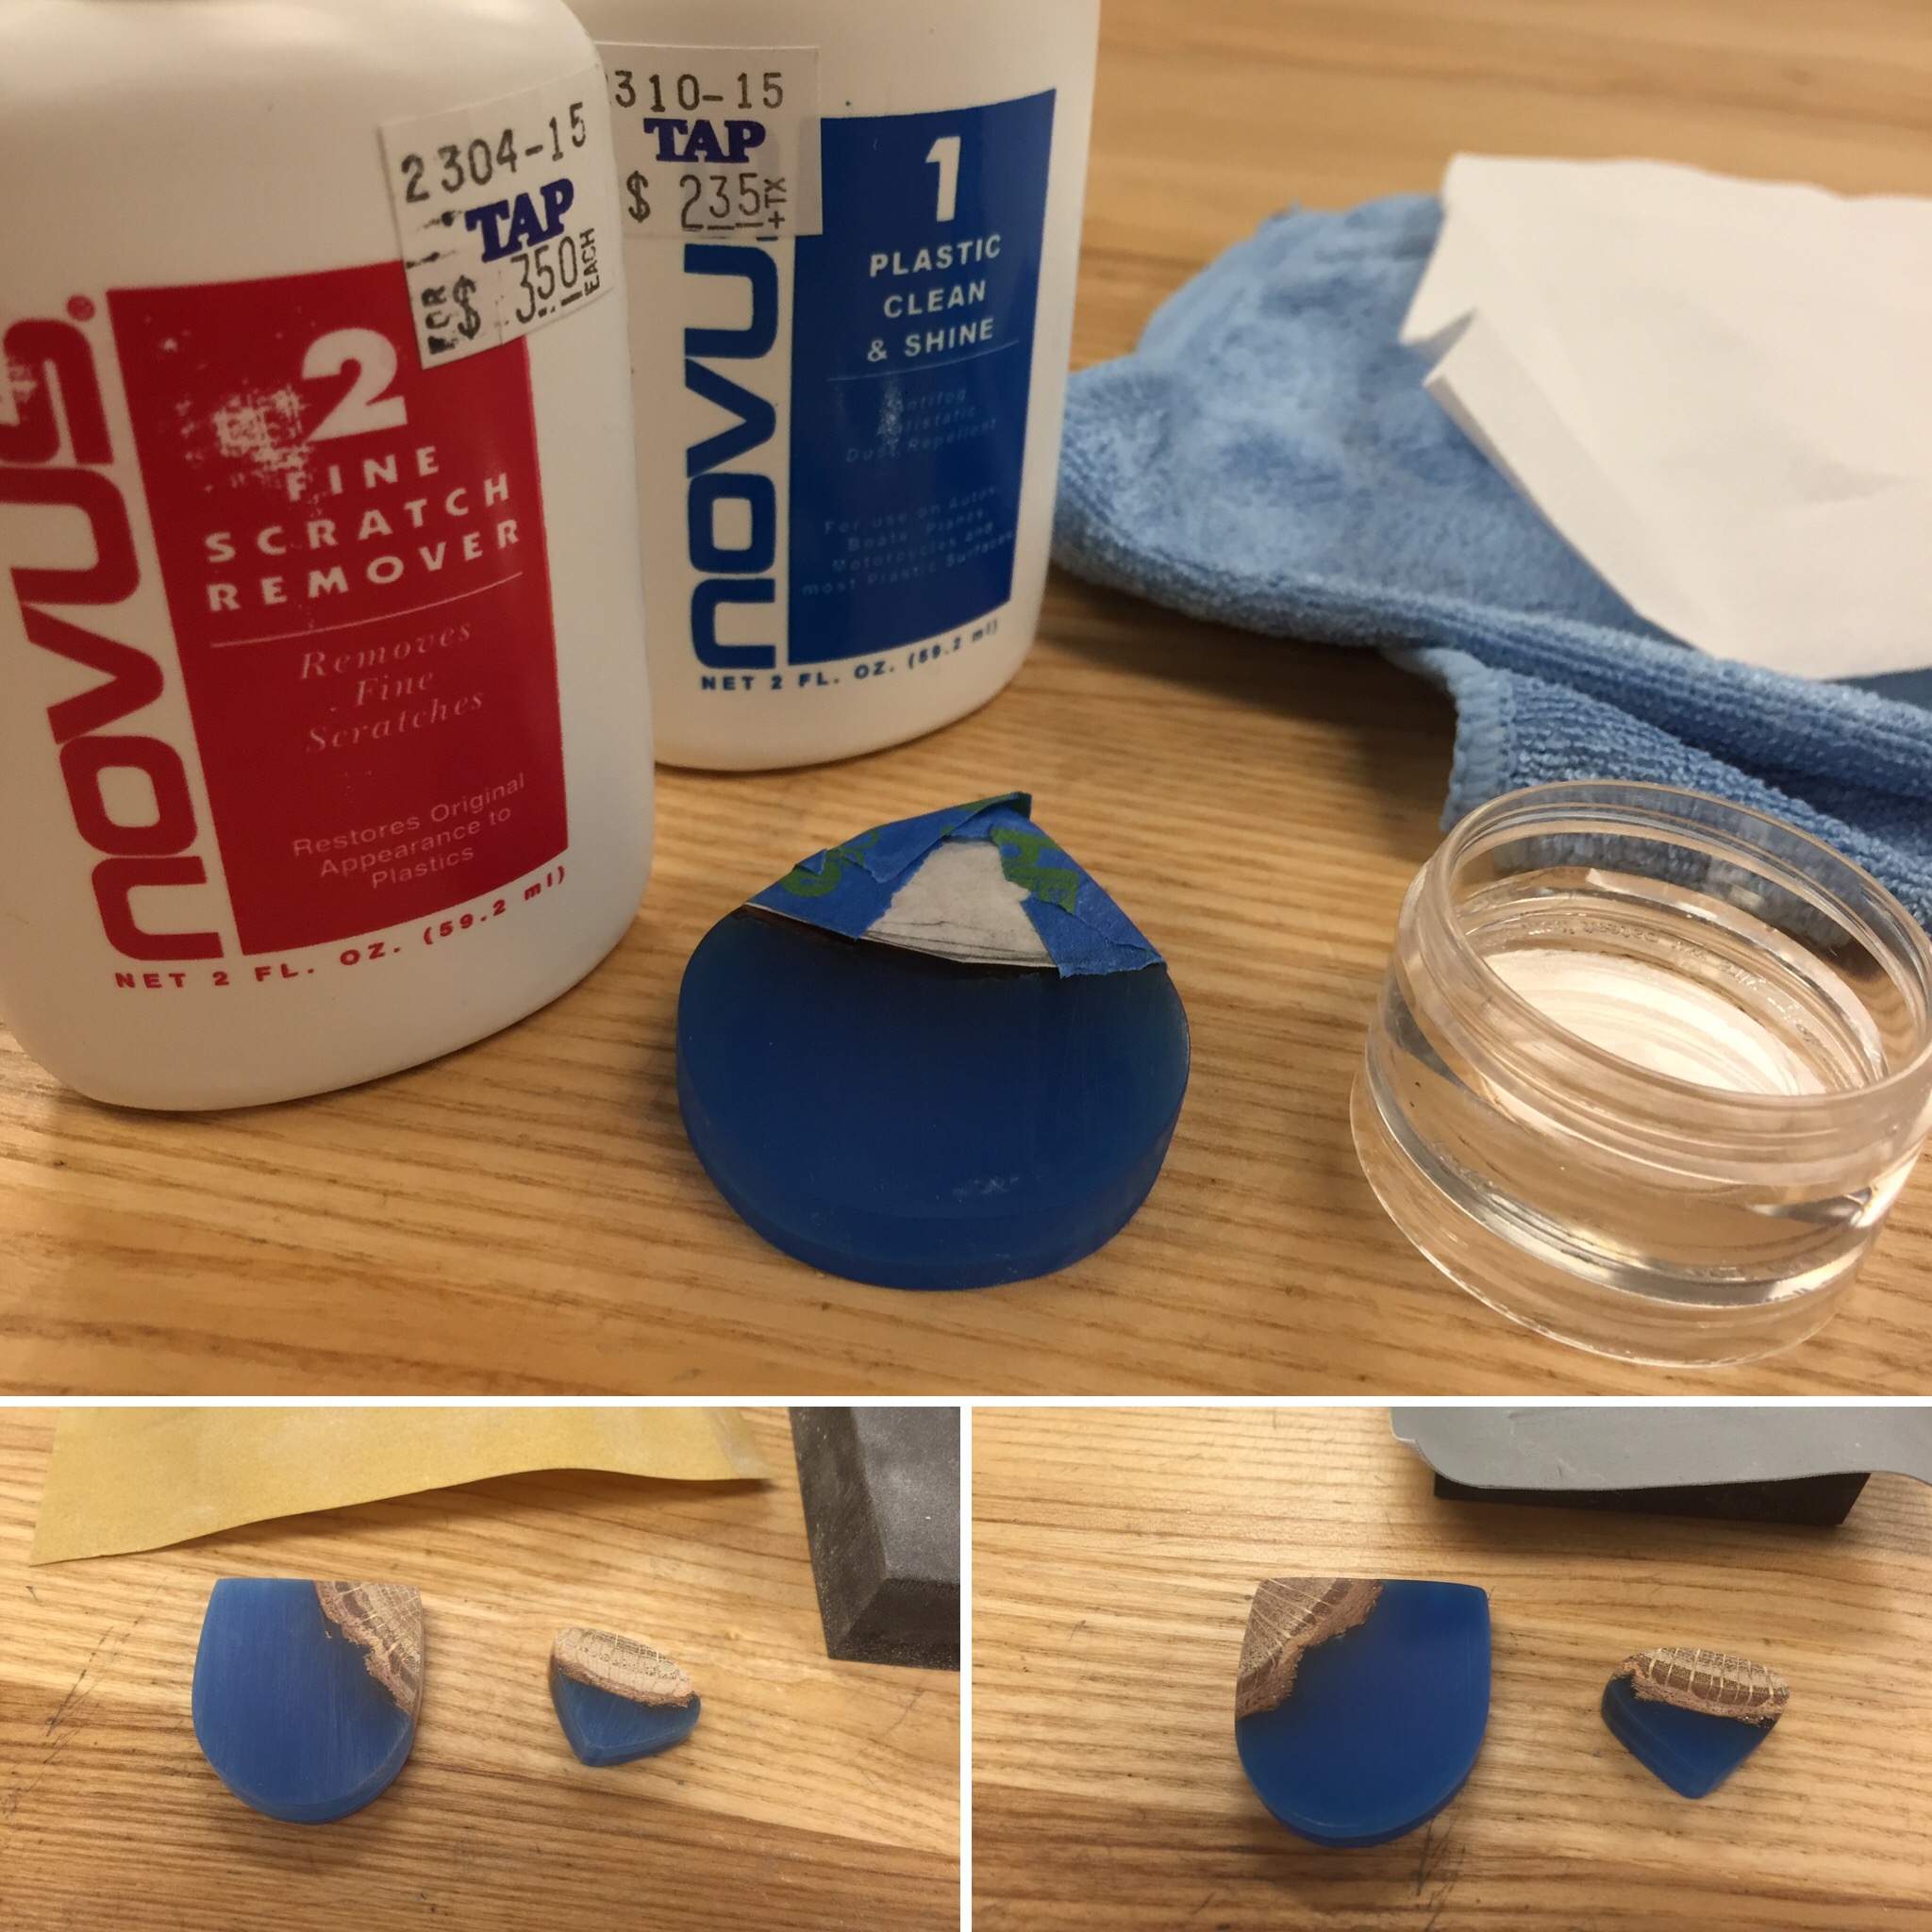
Microfiber clothes used to polish; it's a very slow and manual process (unless you have the right tools), but totally worth it
Final Coatings
I wanted to coat as many layers of the boiled linseed oil as I could to protect and darken the oak.
Hanging on my clothes rack to dry!
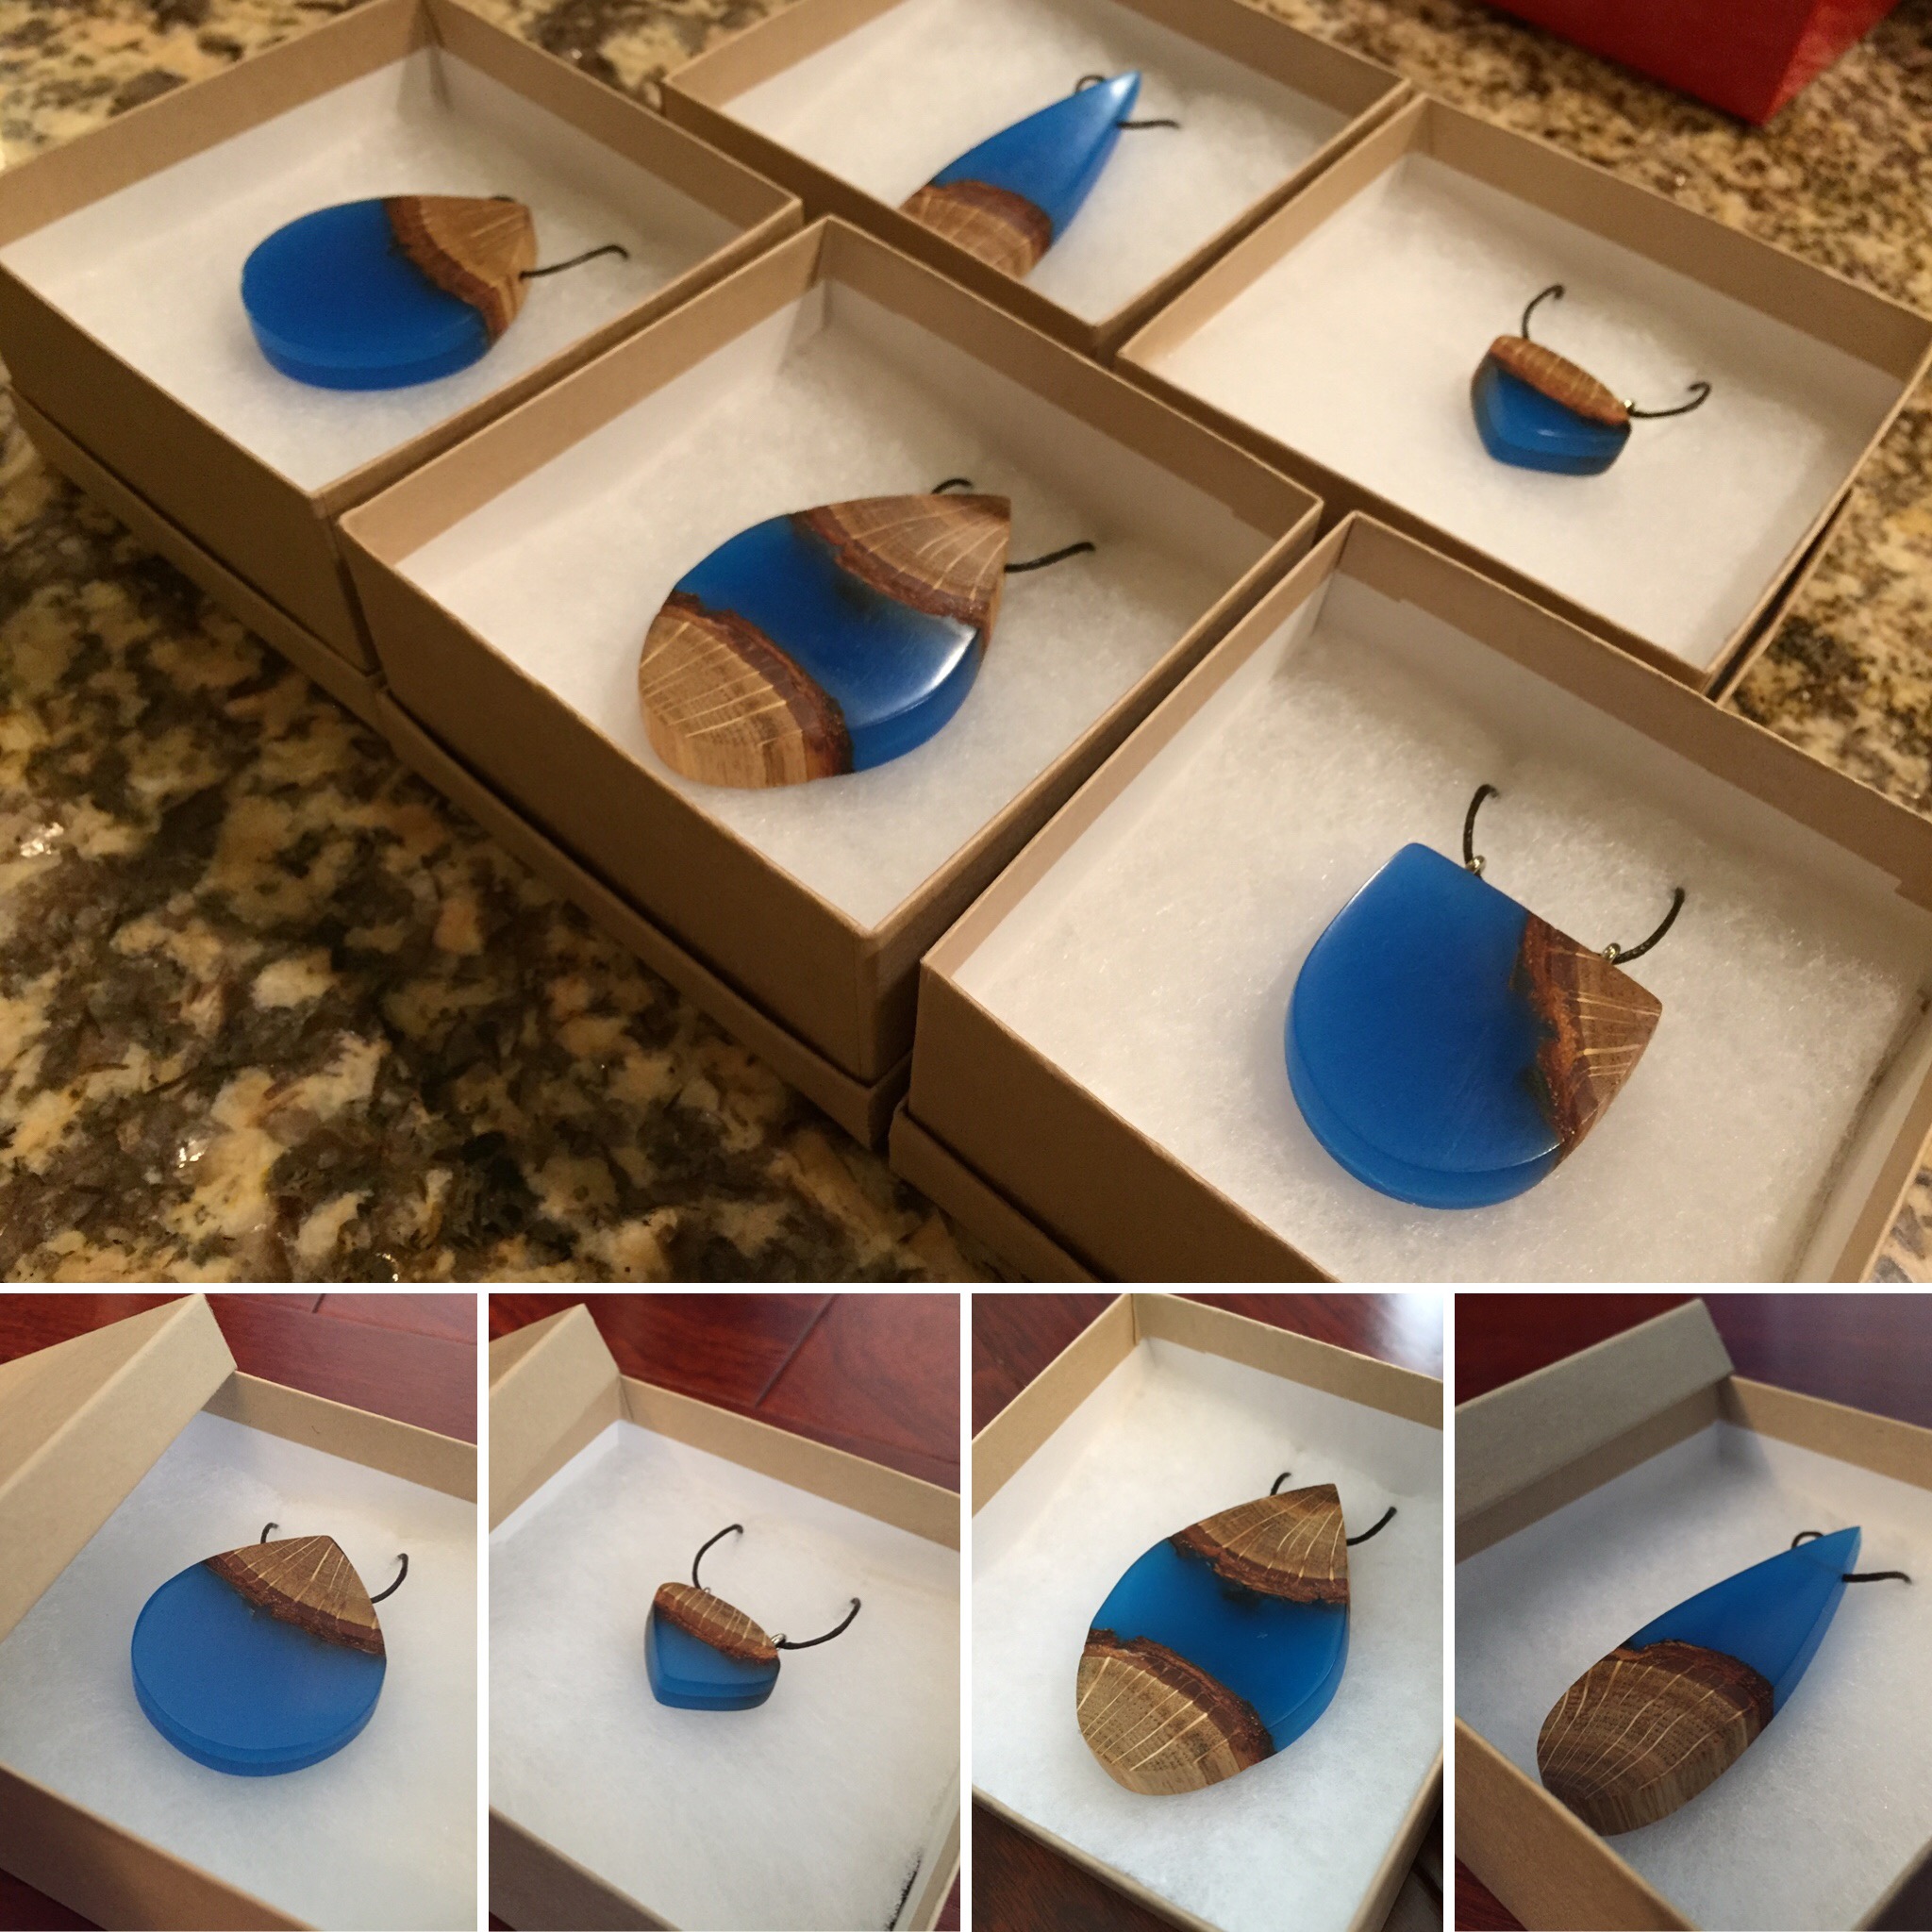
Presentation, Packaging, & Hot Chocolate
Strung the necklaces with wax chord, chord ends, and a lobster clasp. To give the boxes more volume, I stuffed the boxes with tissues and cut slits to hide the chord. Shout out to my little brother, Kevin, for helping me with this! After finishing, we treated ourselves to some nice, hot chocolate!
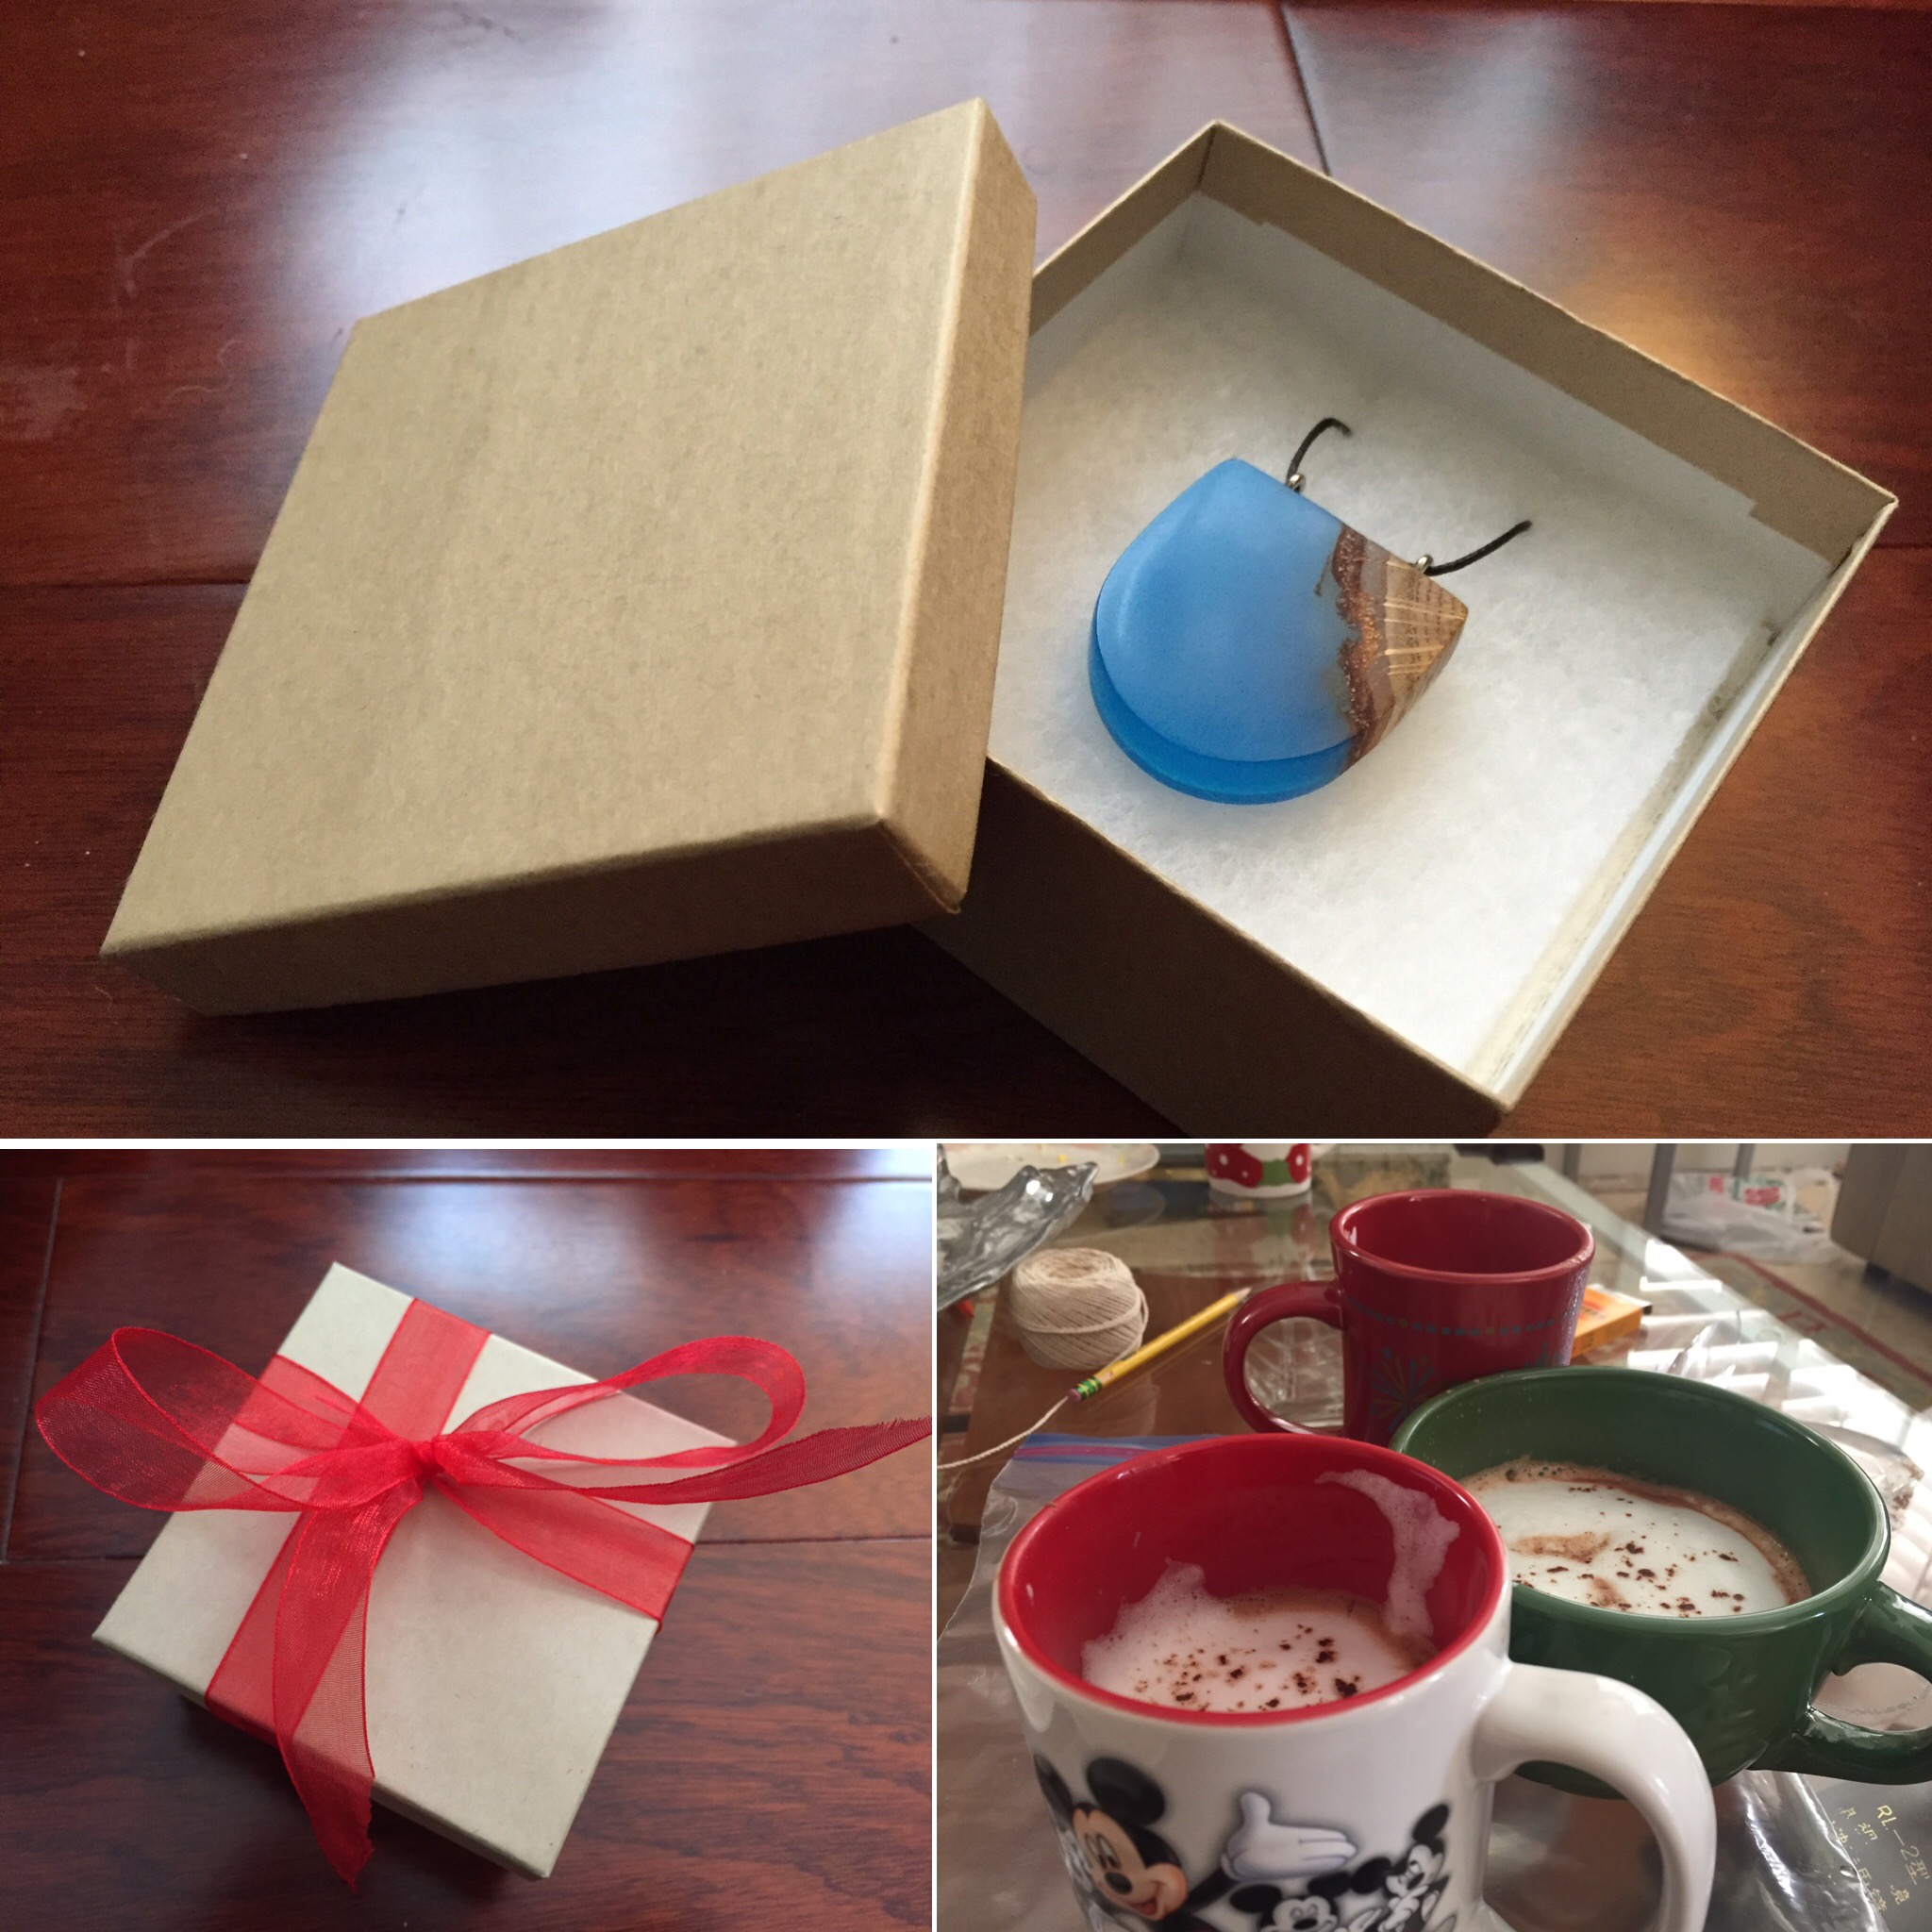
It's feeling a wee bit like Christmas!
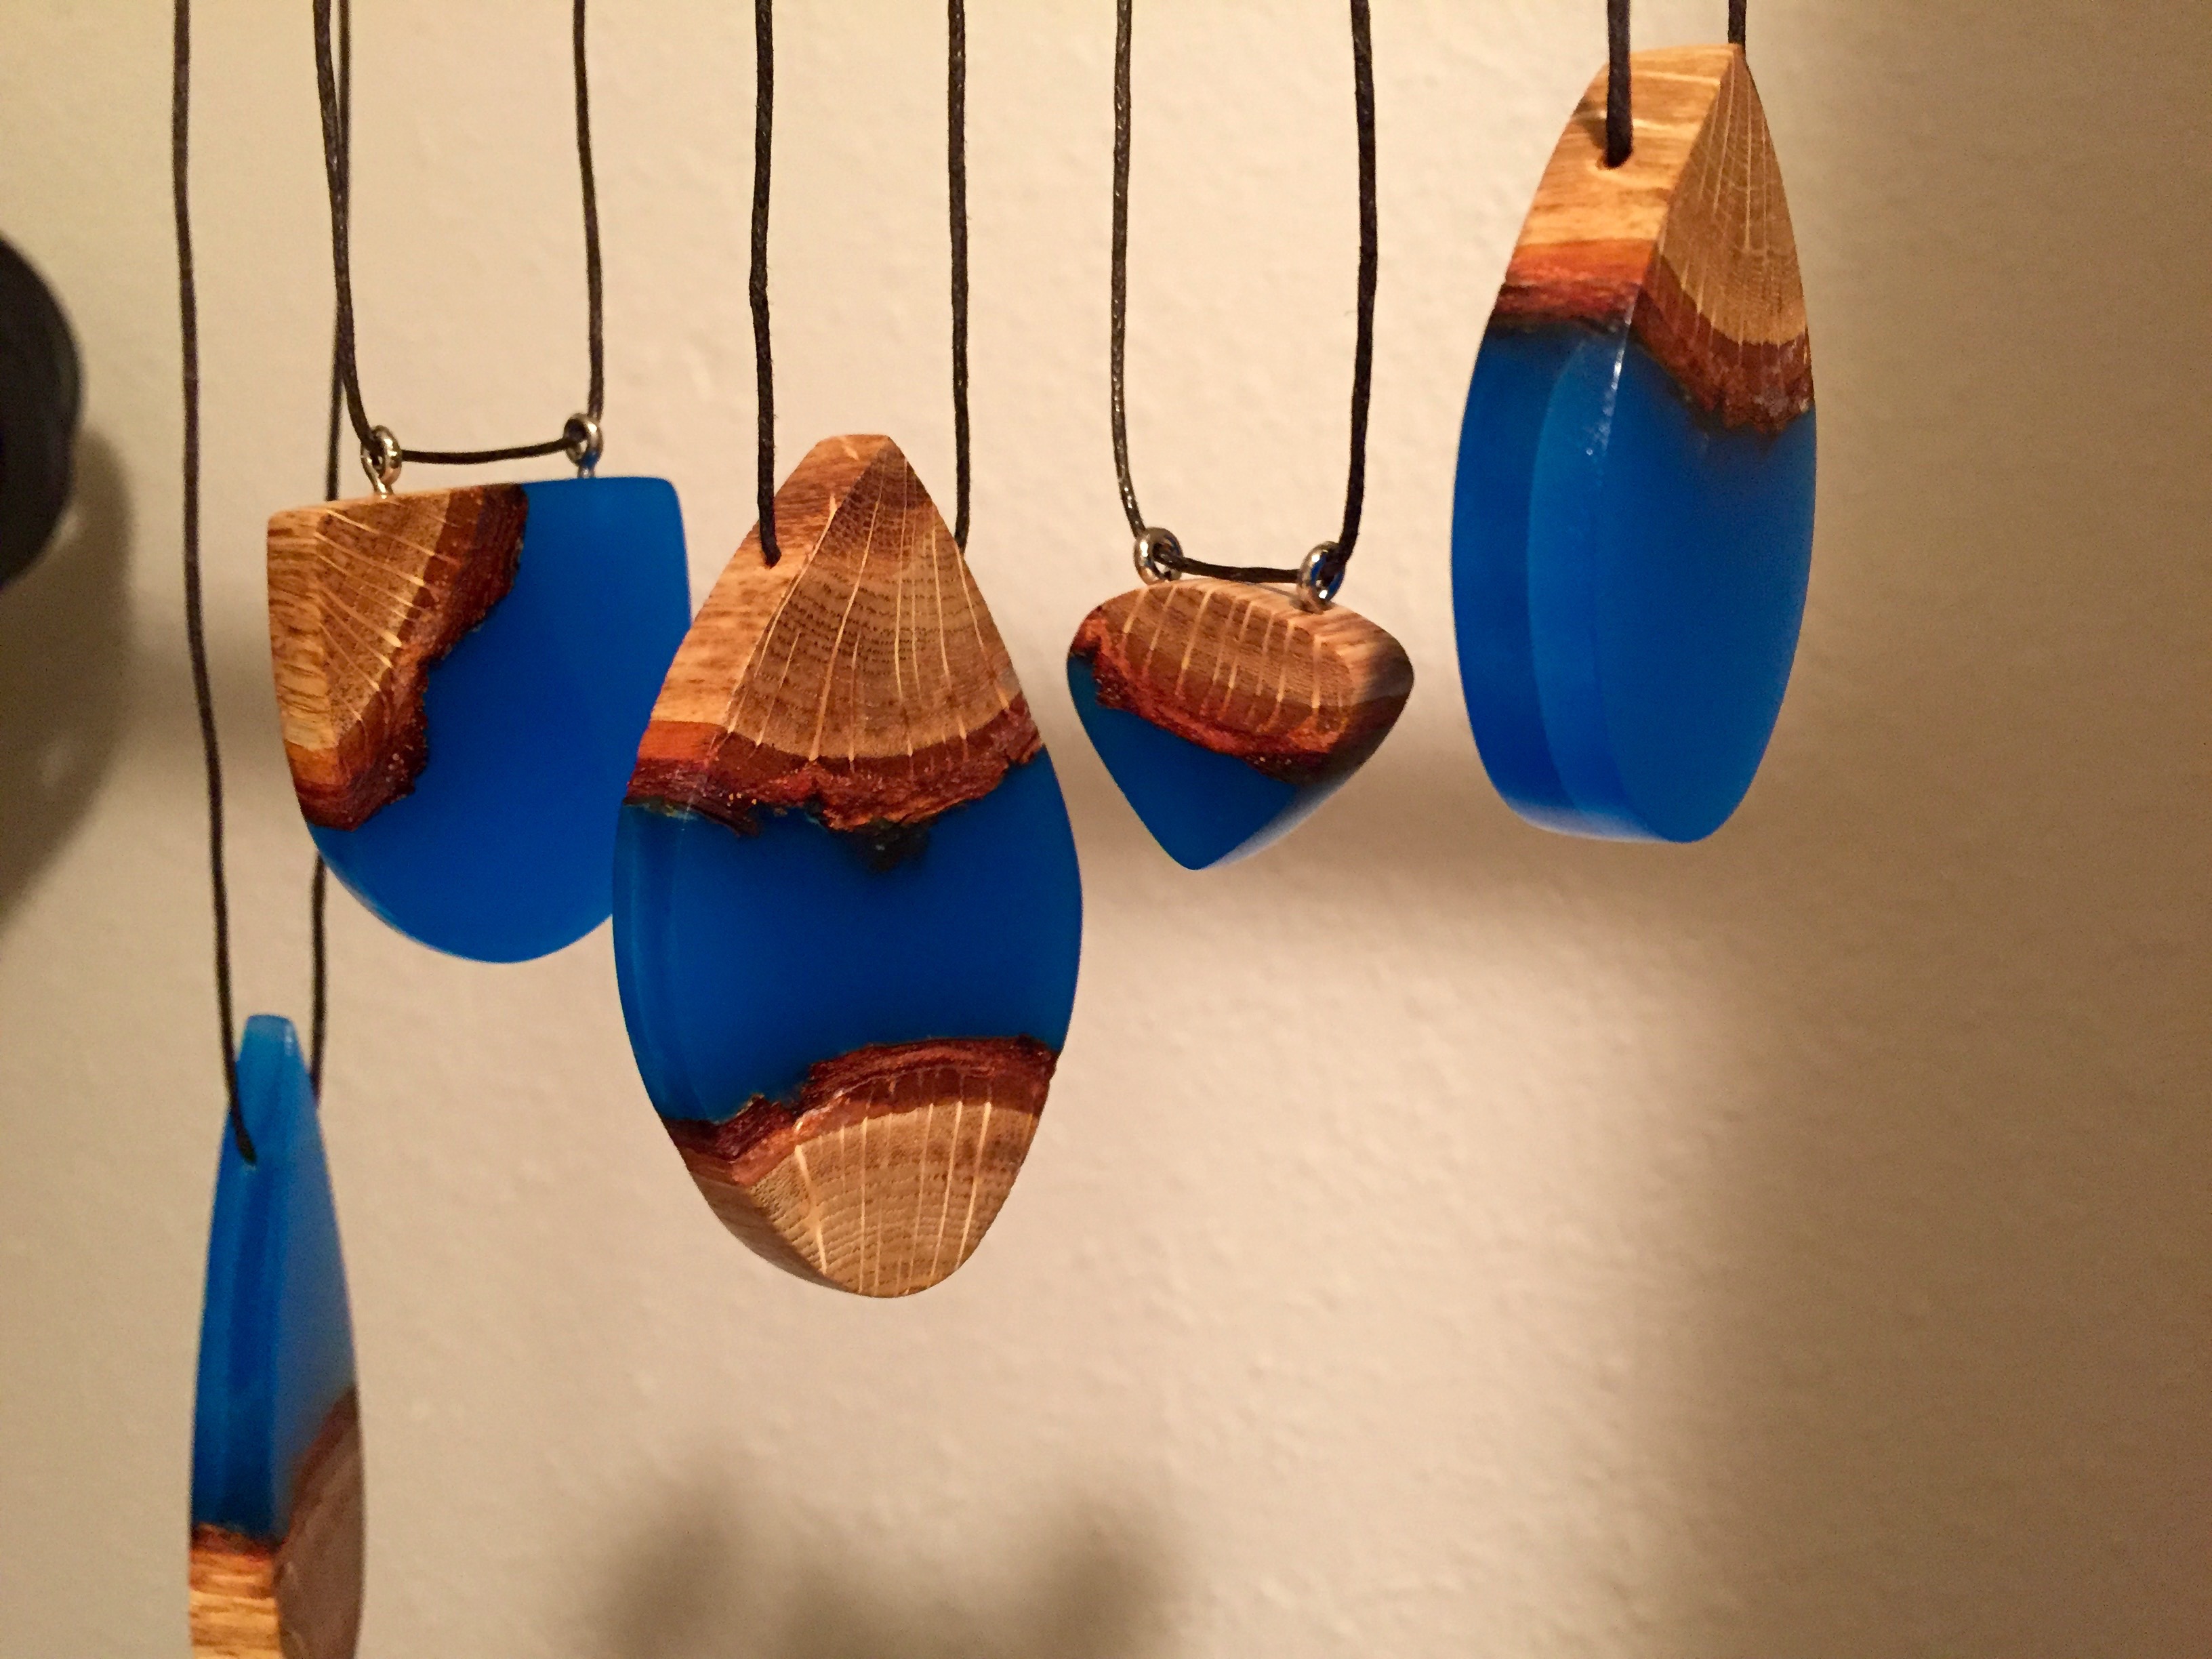
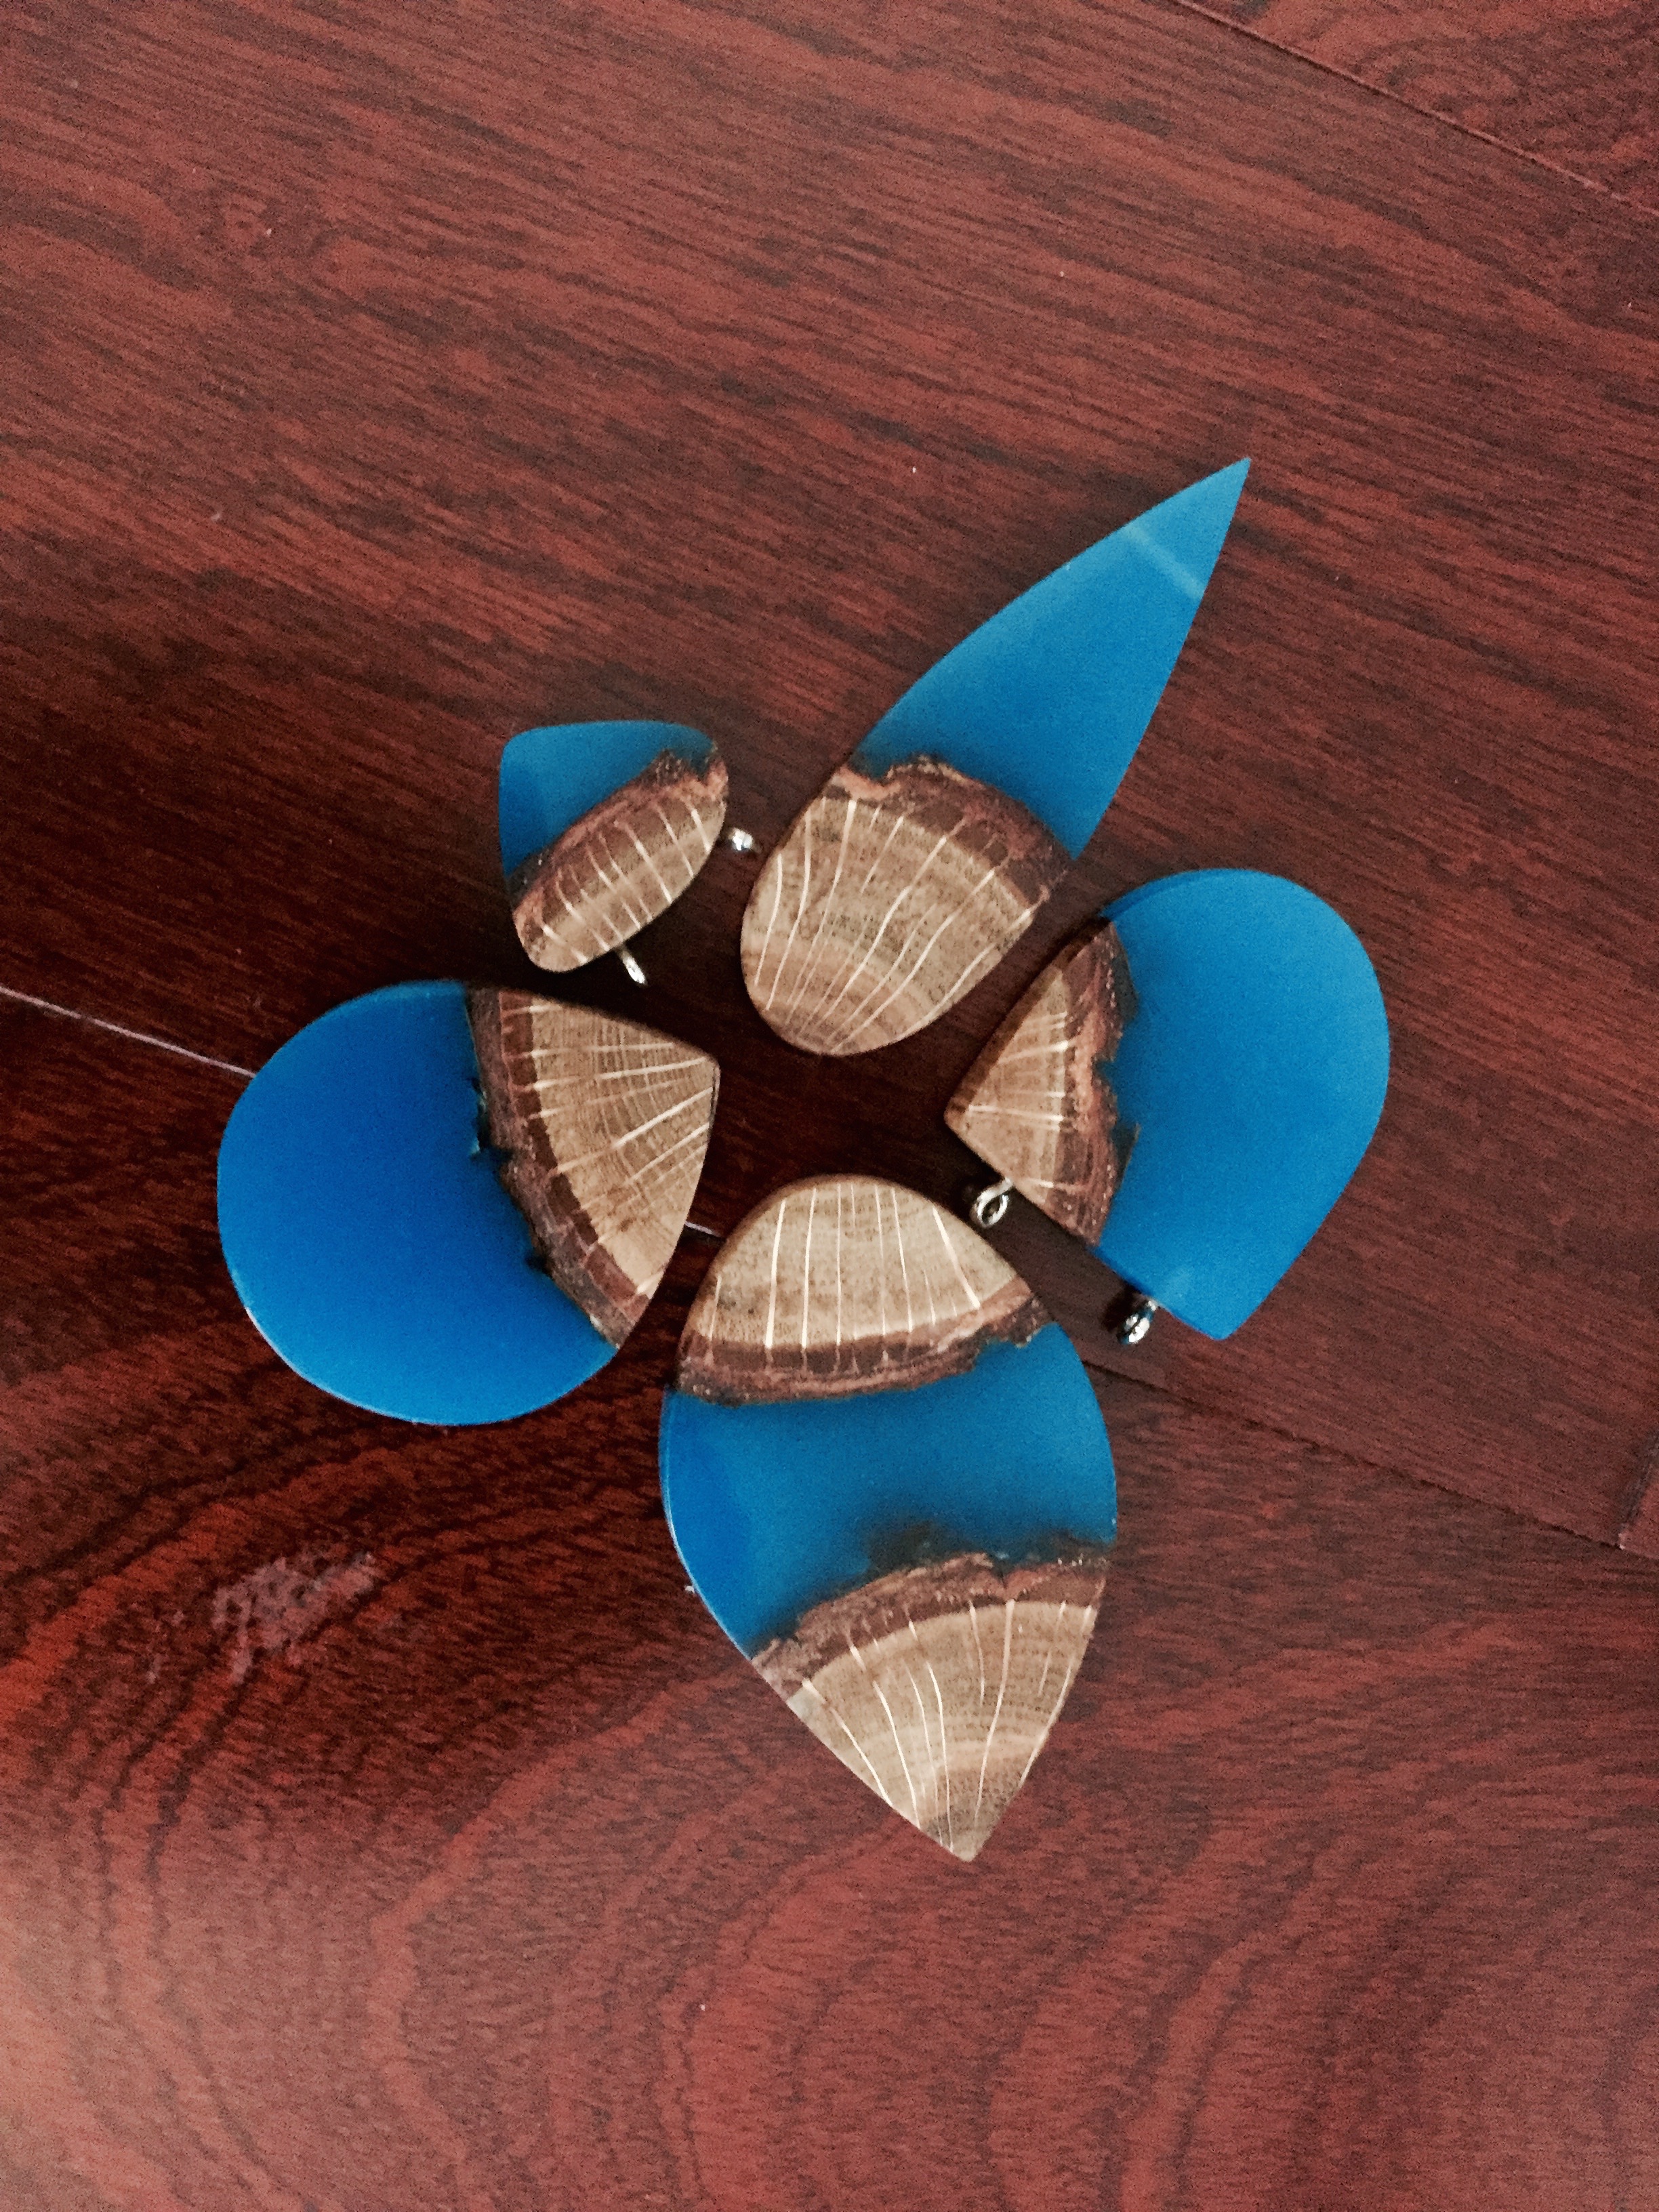
The Full Set
Created from a single piece of wood, I decided to name each piece and write a special message for each piece. From the bottom, counter-clockwise: 'Harmony', 'Smile', 'Teardrop', 'Love', and 'Inverted Ice Cream Cone'!
Day & Night
Here are the pieces in the sun and in pitch darkness
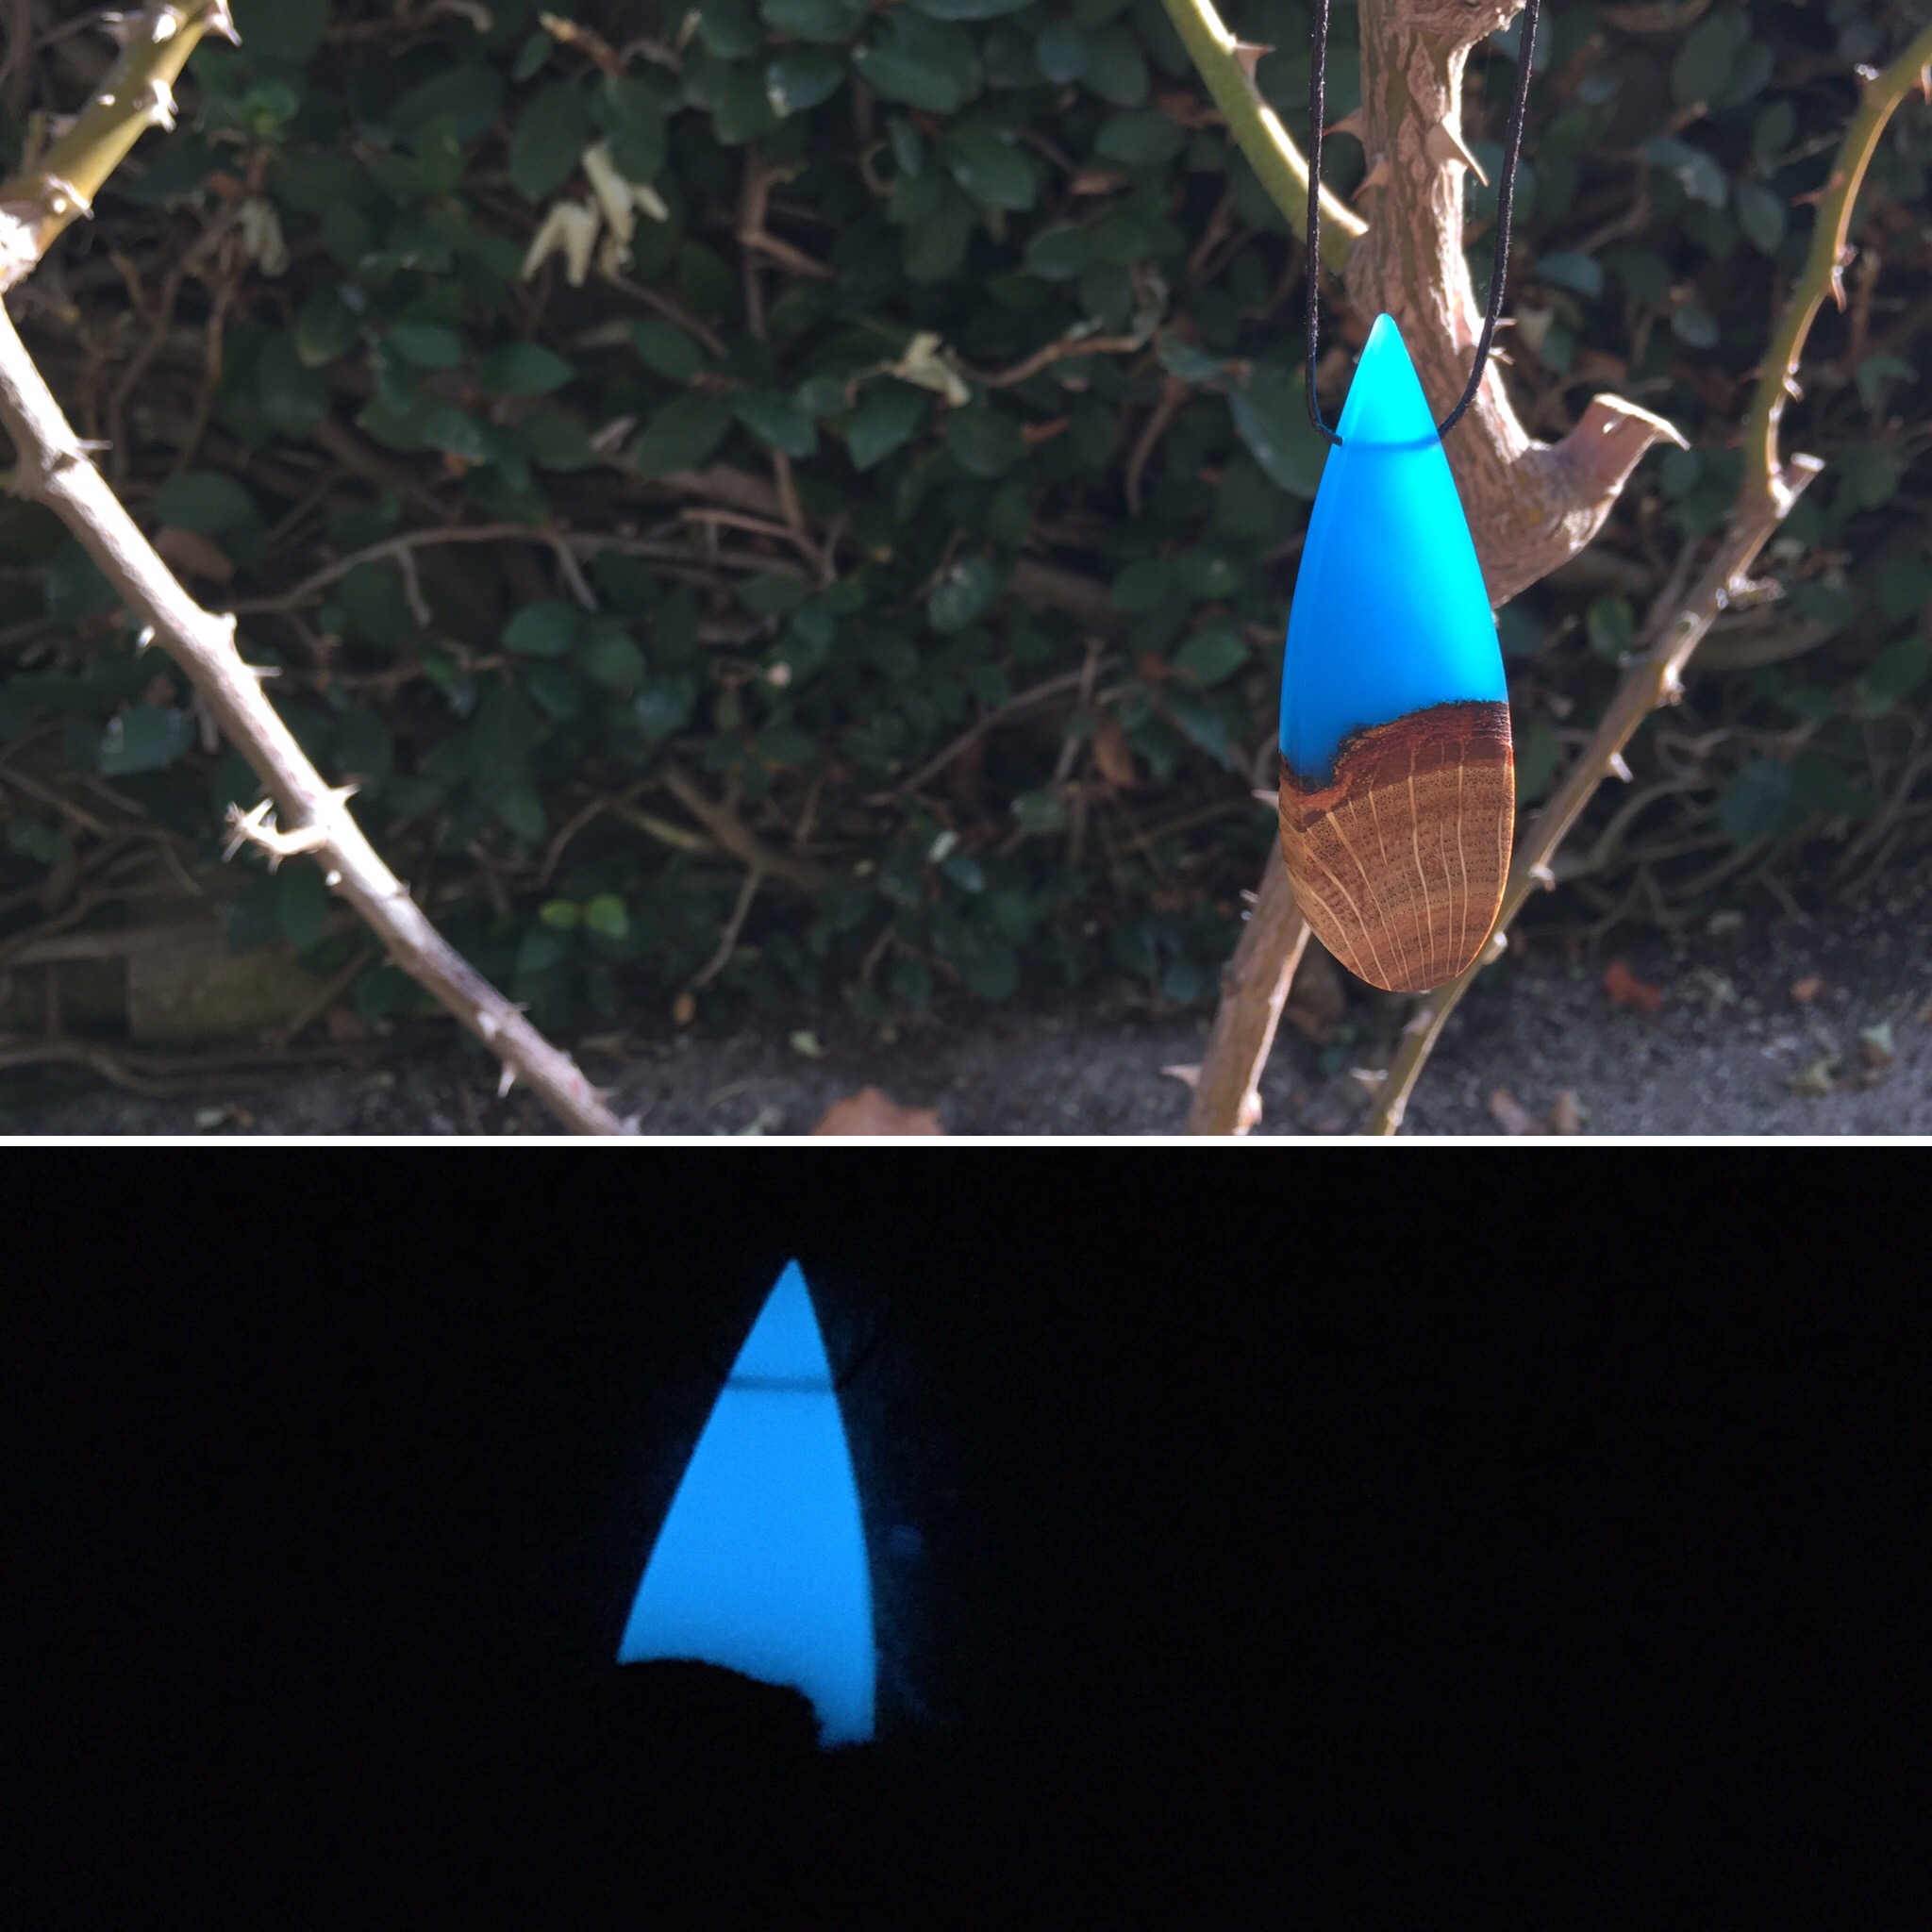
A few minutes of sunlight is all it needs to start glowing at night!
The final result, polished, and in their boxes!